
The number one mistake that untrained users make in QuickBooks has to do with the Undeposited Funds account. In fact, you may have this problem and not even know it. Just the name “undeposited” sounds like something bad – like you made a mistake. In this post, I’ll be unraveling the mysteries of the QuickBooks Online Undeposited Funds account.
What are Undeposited Funds?
The Undeposited Funds account is used to track checks received from customers until a deposit is made at the bank and entered in QuickBooks. I happen to love the Undeposited Funds account because, when used correctly, the amount of the deposit entered in QuickBooks should match up to the deposit amount on the bank statement. This makes the monthly bank reconciliation process super easy.
If the Undeposited Funds account is not used, deposits in QuickBooks must be added together manually to reconcile them to deposits on the bank statement. Since I am a fan of 5MinuteBookkeeping tips, I don’t recommend spending time manually adding numbers together.
How Undeposited Funds Work in QuickBooks Online
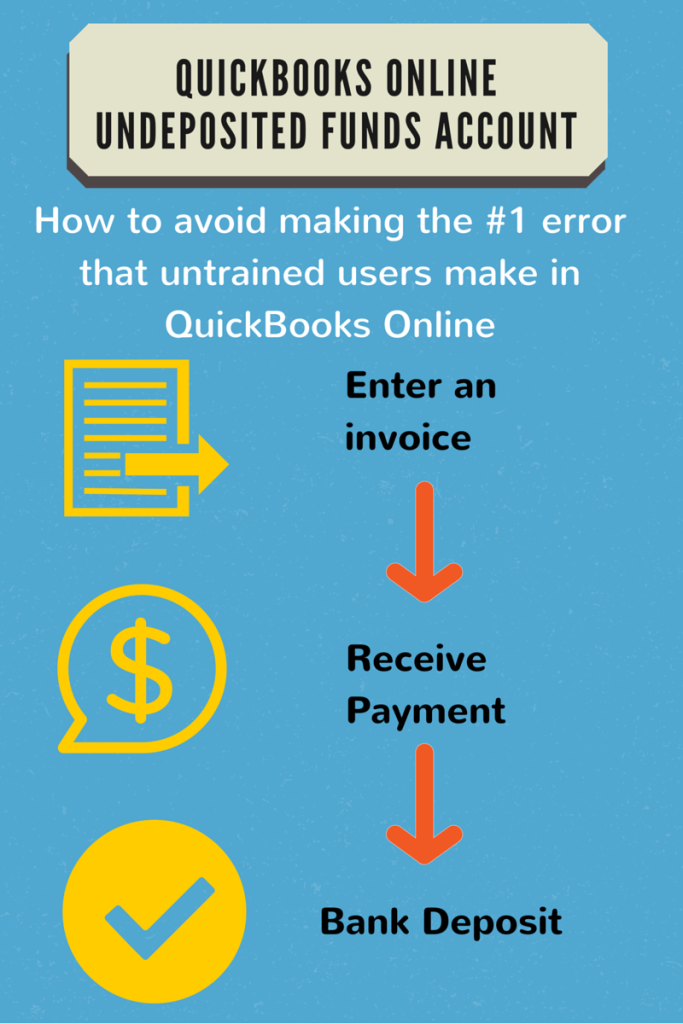
First, you need to understand that there are 3 steps to getting this right and that you must do these 3 steps in order. Here is a video:
Step 1 – Invoice
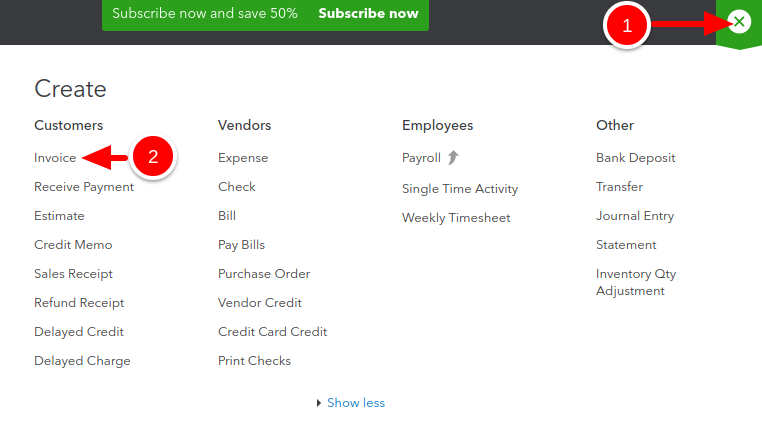
1. First, you enter a customer invoice by clicking on the + sign (top center).
2. And then, select Invoice.
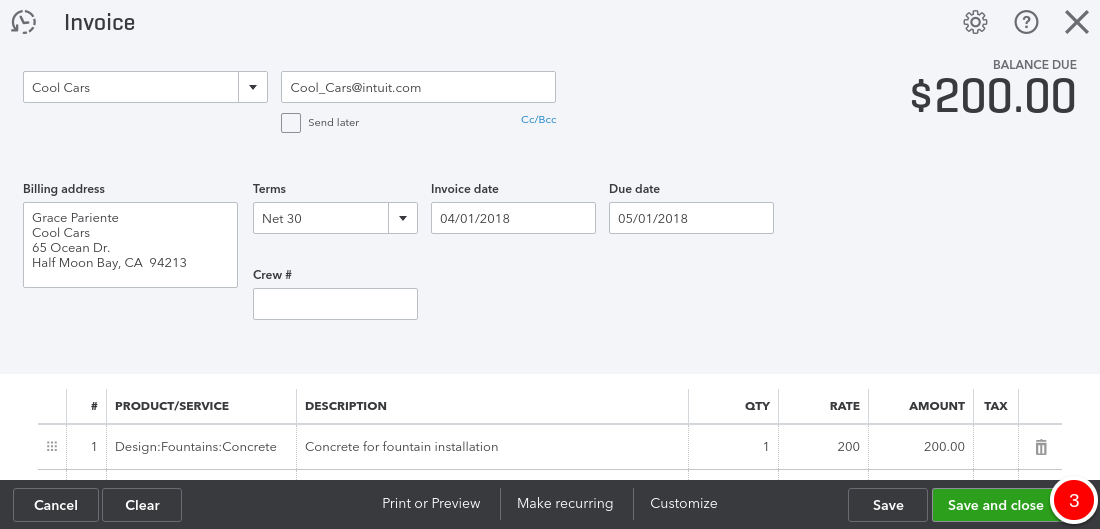
3. Once the customer invoice has been entered, select save and close.
Step 2 – Receive payment
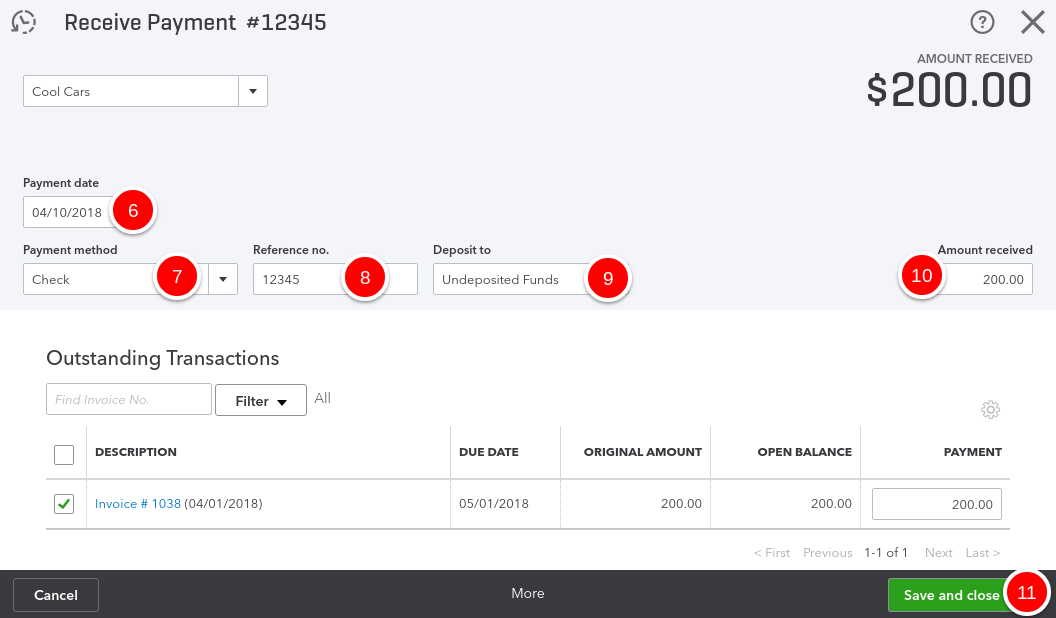
When you receive a check payment from your customer, you enter the payment received from the customer.
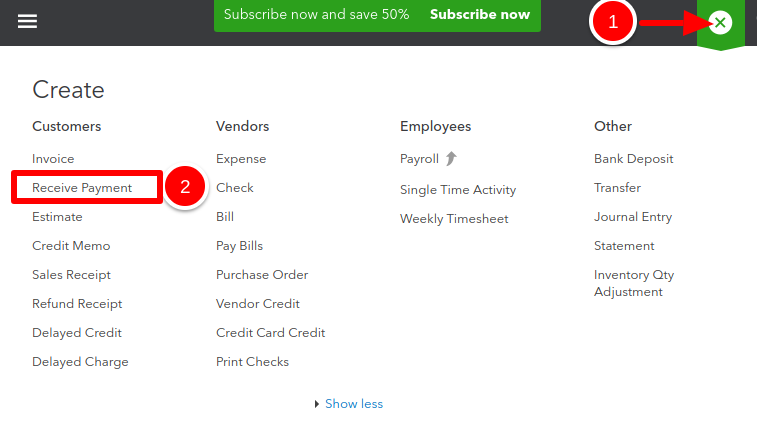
1. Click on the + sign (top center).
2. Select Receive Payment.
3. Enter the customer name or invoice number.

4. A list of open invoices for that customer will appear.
5. Select the invoice(s) that you received payment for.

6. Enter the date.
7. Select Check as the payment method.
8. Enter the check number in the reference number.
9. Be sure that the Deposit to account says “Undeposited Funds”.
10. Enter the amount of the check (if different from the original invoice amount).
11. Click Save and Close.
Step 3 – Bank Deposit
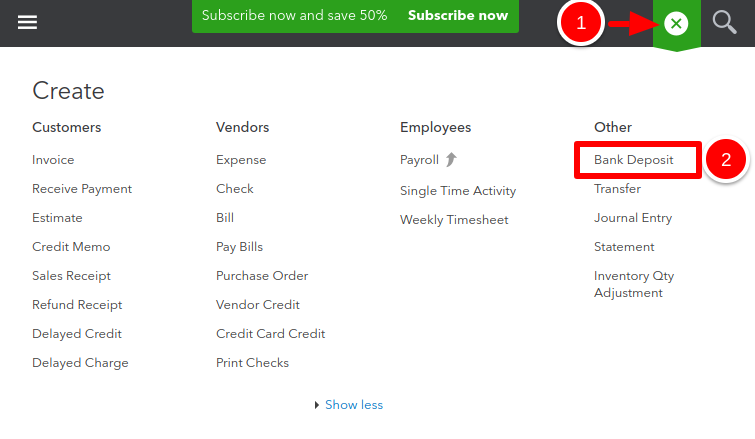
1. Click on the + sign (top center).
2. Select Bank Deposit.
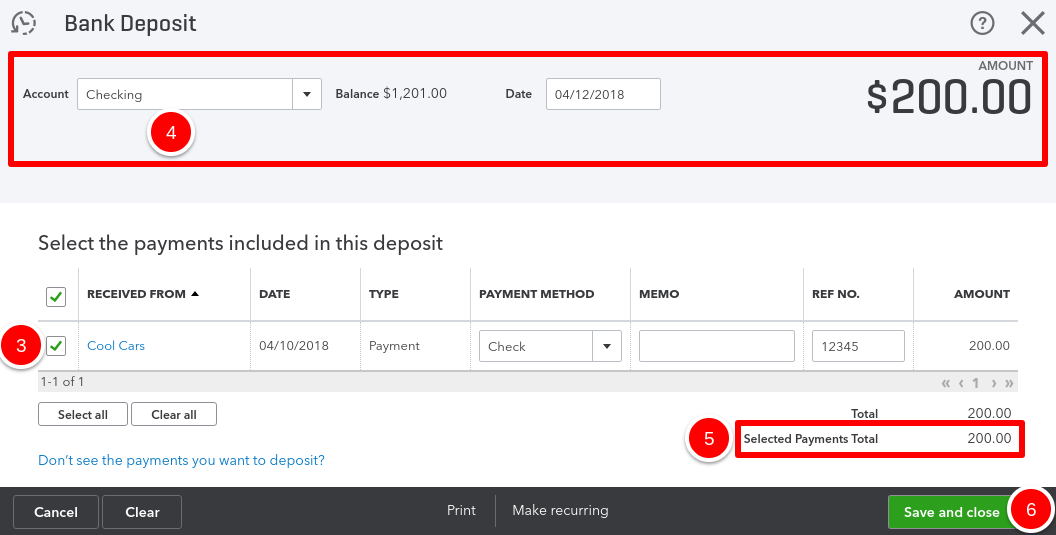
3. Click next to each check you entered in Step 2 to select the customer payments.
4. Make sure that the bank account name, date, and amount are correct.
5. It’s very important for the total amount of the deposit to equal the amount of the deposit you made at the bank.
6. Click Save and Close.
That’s it. By following all 3 steps in order you will not make any mistakes with the Undeposited Funds account.
How does the Undeposited Funds account get messed up?
Undeposited Funds gets messed up because untrained users don’t follow the 3 steps I just showed you. Normally, they enter an invoice, enter a customer payment, and then enter a manual deposit to “Sales Income” instead of selecting the customer payment from the list in the Bank Deposit window.
If you follow the 3 steps I showed you – in order – Undeposited Funds will not get messed up.
How do you know if you have old balances in Undeposited Funds?
You can easily see if you have old balances in Undeposited Funds.
1. Click on the+ sign (top center).
2. Select Bank Deposit.
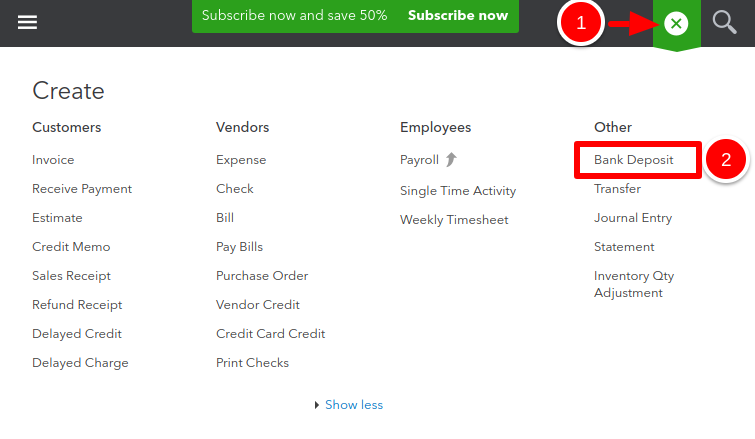
3. You will see old balances in the Select Existing Payments window in QBO.
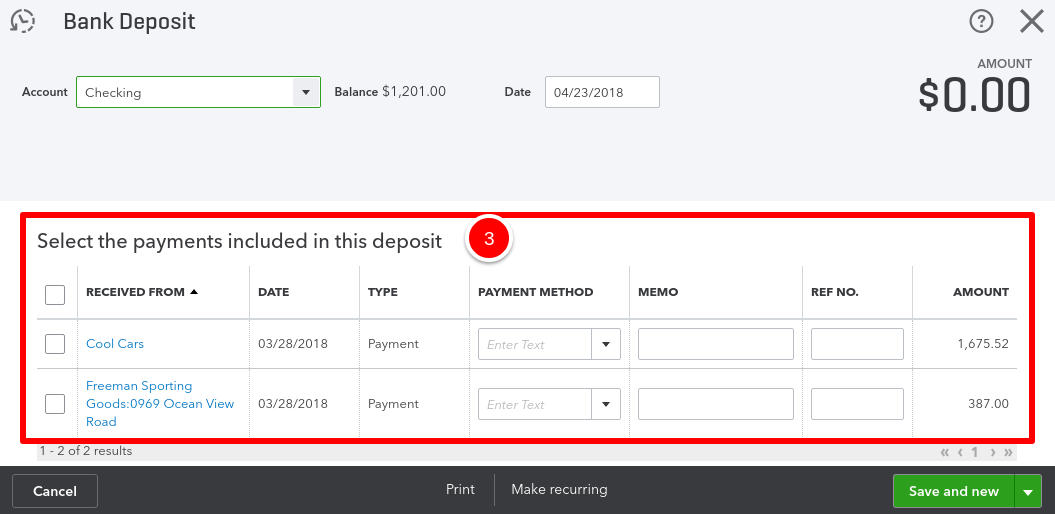
How do you fix old balances in Undeposited Funds?
To learn how to fix old balances in Undeposited Funds, check out the continuation of this blog post: How to clean up Undeposited Funds in QuickBooks Online. You will learn the most common reasons for old balances, and you will receive instructions on how to fix them. However, if you understand the 3 steps I showed you, then you may be able to find where you went wrong and be able to correct your entries. But, know that it takes some detective work to figure out what happened to each transaction.
Final words
Now you know how to work with Undeposited Funds. Take time to see if you have any problems with your Undeposited Funds account.
Please share this content and subscribe to our blog so that you can stay up to date on the latest tutorials and content.




Wow, attractive website. Thnx ..
It is nice to be able to read something so clear and understandable. I can get lost really easily with financial processes, but this seems like it would be really simple. Do you think that I should talk to my accountant about quickbooks? Thank you for an informative article!
QuickBooks makes bookkeeping seem simple and parts of it are simple. However – bookkeeping and accounting can also have some very intricate and complicated areas – that’s why there are professionals! I encourage you to talk to your accountant to get help with QuickBooks.
What if the payments were cash and are kept in a cash box; then a varied amount is deposited into the bank occasionally with a float left in the cash box? Do I have to make sure I only bank-deposit cash in an amount equal to a number of real payments summed up?
Hi Kent,
You should definitely run this question by our Facebook group: https://www.facebook.com/groups/5minutebookkeeping/