
Daisy, a small business owner, is so busy running the day-to-day operations of her business that she doesn’t have much time to go into QBO and enter transactions. However, Daisy doesn’t want to get behind because she knows that she needs to have her transactions entered in QBO for key financial reasons, such as filing a tax return or getting a loan from the bank. Basically, Daisy wants to know the quickest ways possible to get her transactions recorded in QBO. In this post, I’m going to show you two quick ways for adding transactions in QuickBooks Online. These include the Quick Create menu and the Banking Transactions center. Let’s go!
The Quick Create Menu
The Create menu allows you to manually enter transactions for customers, vendors, employees, and other types of transactions.
To access the Quick Create menu:
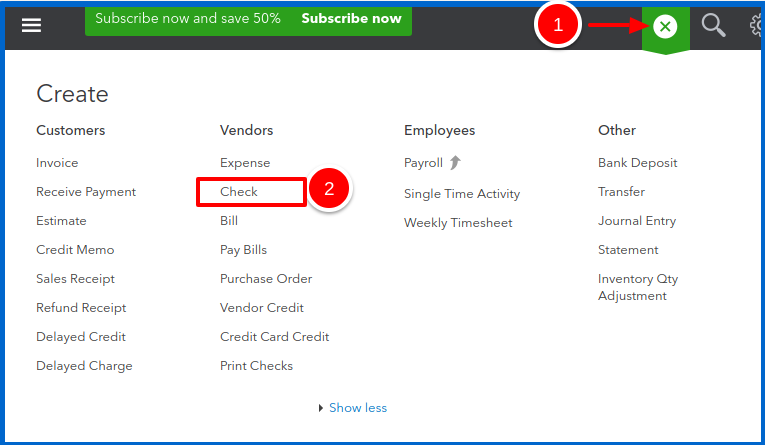
Select the Plus (+) icon in the upper right-hand corner of the screen.
![]()
Once the Quick Create menu opens, you’ll be able to add transactions such as customer invoices, customer payments, and credit memo’s. You’ll also be able to add vendor bills, pay bills, enter checks and expenses, and enter deposits.
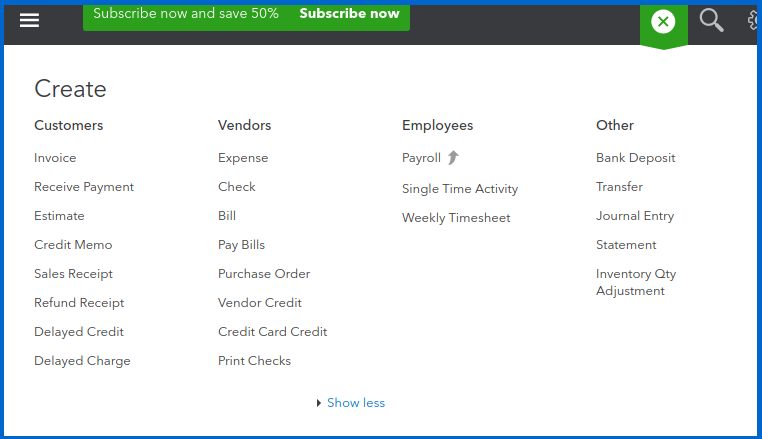
Let’s say you want to enter a customer invoice.
To do this:
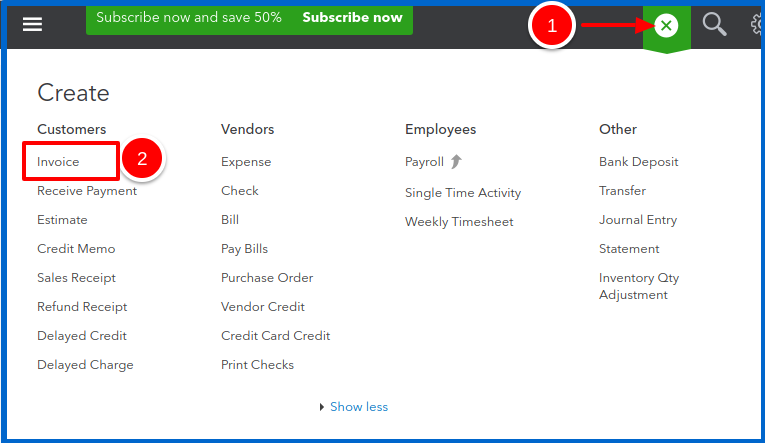
- Open the Quick Create menu.
- And, under the Customers section, select Invoice.
A blank invoice will automatically open.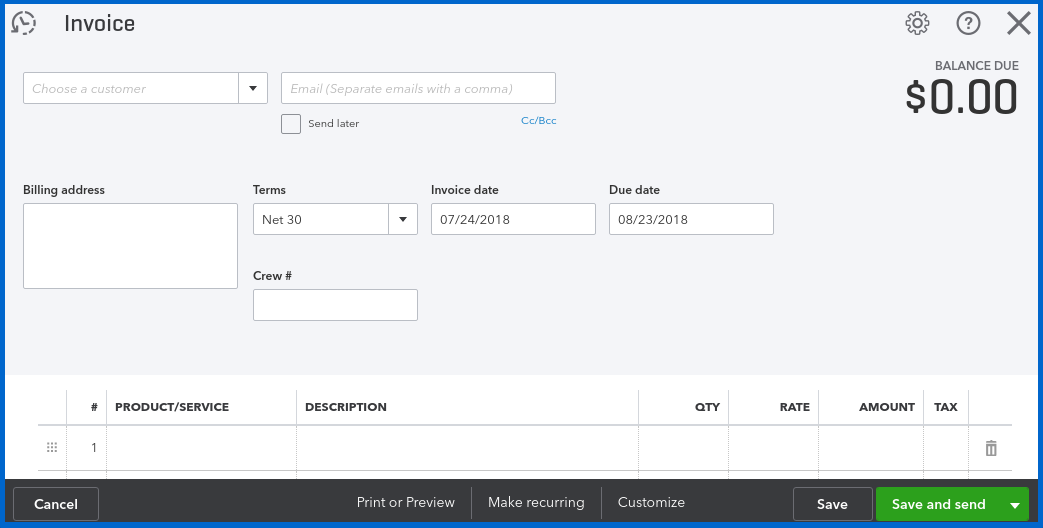
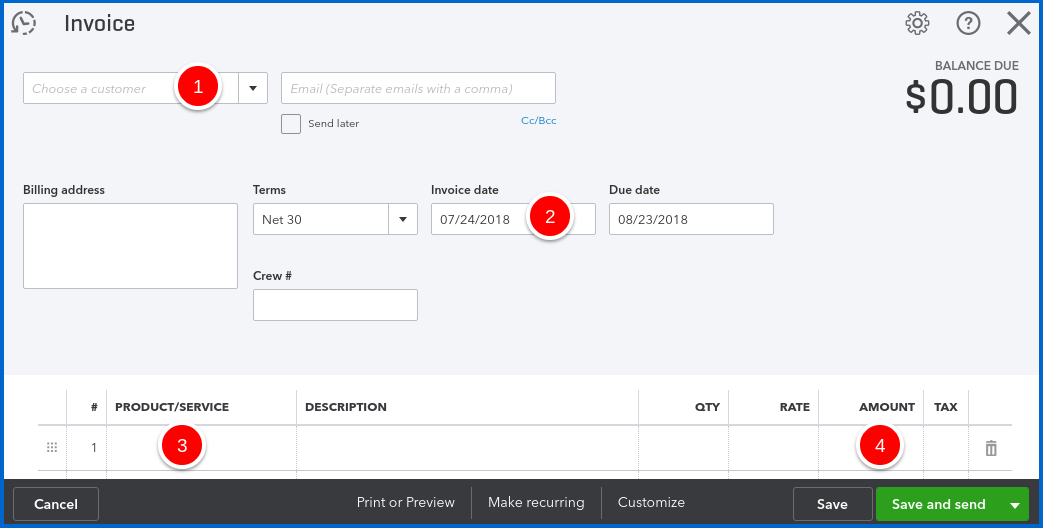
From there, you can:
- Enter a customer name.
- Give the invoice a date.
- Enter the Product/Service that you are selling to the customer.
- Enter the amount you are invoicing the customer for.
Now, let’s say you want to enter a check for an expense that you paid to a vendor.
- Again, open the Quick Create menu.
- Now, under the Vendors section, select Check.
A blank check will automatically open.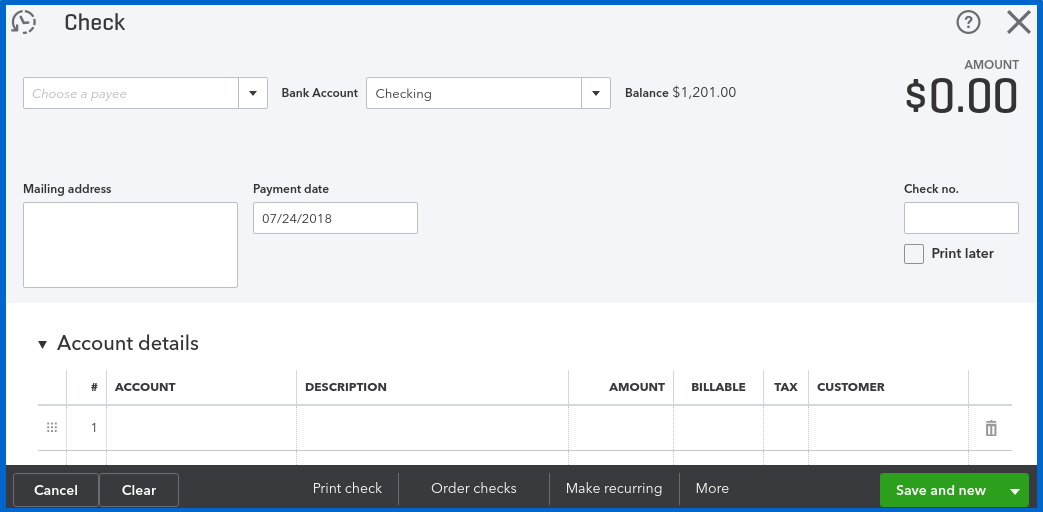
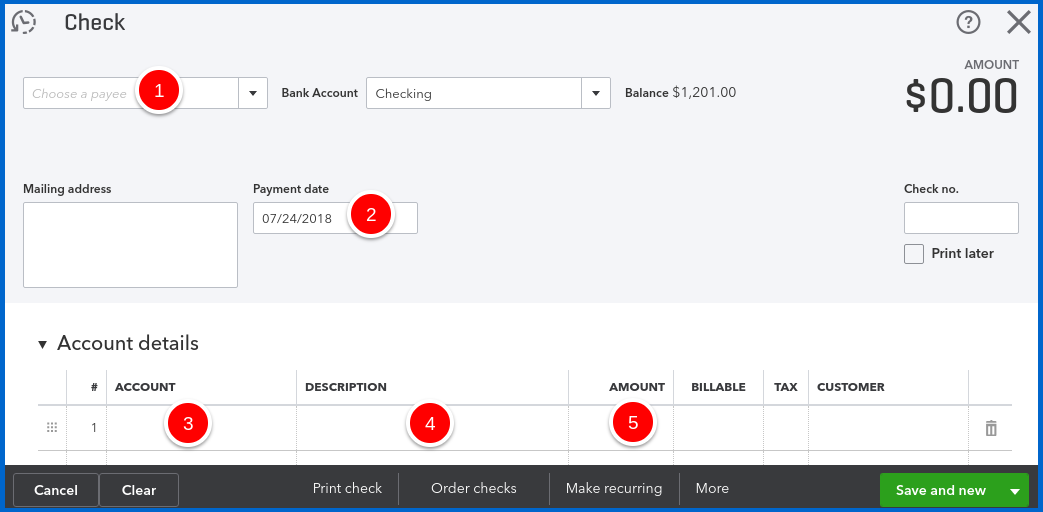
From here you can:
- Enter a vendor name to indicate who the check is written for.
- Enter the date of the check.
- Assign the check to an expense category.
- Write a Memo/Description as to what the check is for.
- And, finally, enter the check number, which you always want to do when recording a check in QBO.
These are just some of the transaction you can create on the fly using the QBO Quick Create menu. I highly encourage you to explore this feature and try creating other transactions which are available in the Quick Create menu.
[Bank feeds in just 5 minutes a day? No problem!
>>Click Here to claim the free cheat sheet]<<
The QBO Banking Center
The Banking Center also allows you to quickly add bank and credit card transactions. If fact, the Banking Center is the easiest way to enter transactions in QBO. But, keep in mind that this method does not fully automate your bookkeeping since you will still have to manually enter some transactions in QBO. Remember, QBO Banking Transactions are designed to save time.
Before you begin adding transactions through the QBO Banking Center, be sure to:
- Add bank and credit card accounts to the chart of accounts in QBO.
- Connect your bank or credit card accounts to QBO.
How to connect your bank or credit card account to QBO
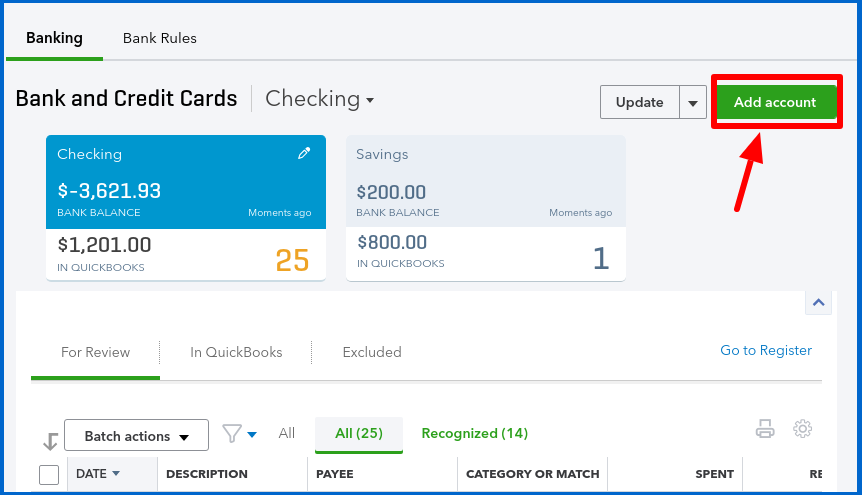
Go to the left-hand menu bar, and select Banking.
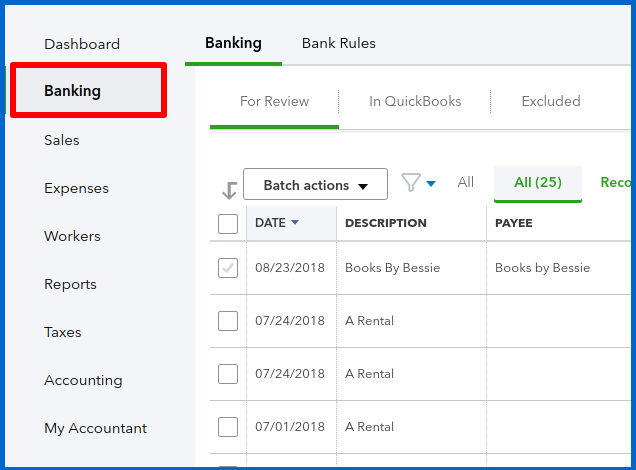
Click Add Account in the upper right.
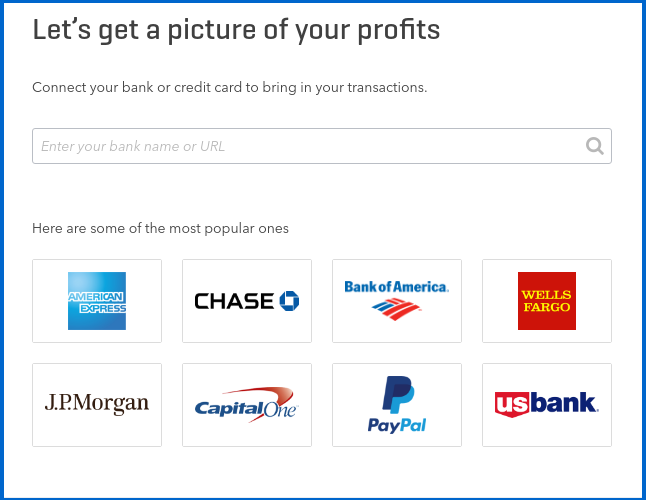
Enter the name of your Financial Institution or click the Logo of your Financial Institution.
Enter your Online ID or User Name.
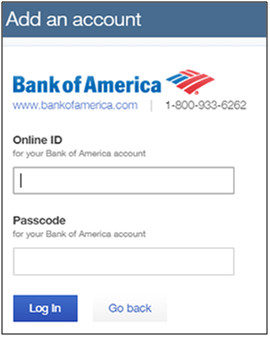
Enter your Passcode or Password. Then, click Log in. The connection process may take a few minutes.
A window will appear asking you to map the bank accounts from your financial institution to the bank accounts in your chart of accounts list.
Select the bank or credit card account by clicking on the box next to it (on the left). Then, select the corresponding account you set up in the QuickBooks chart of accounts (on the right side).
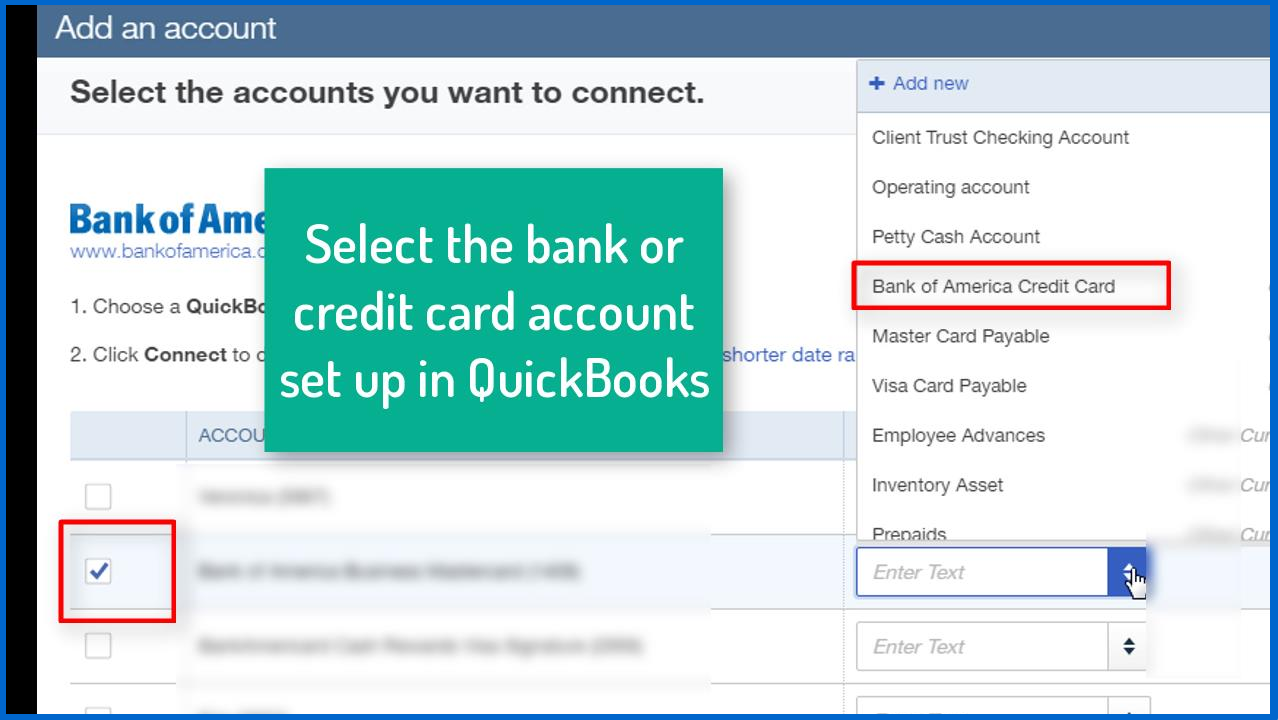
Typically, only 90 days of transactions will be downloaded.
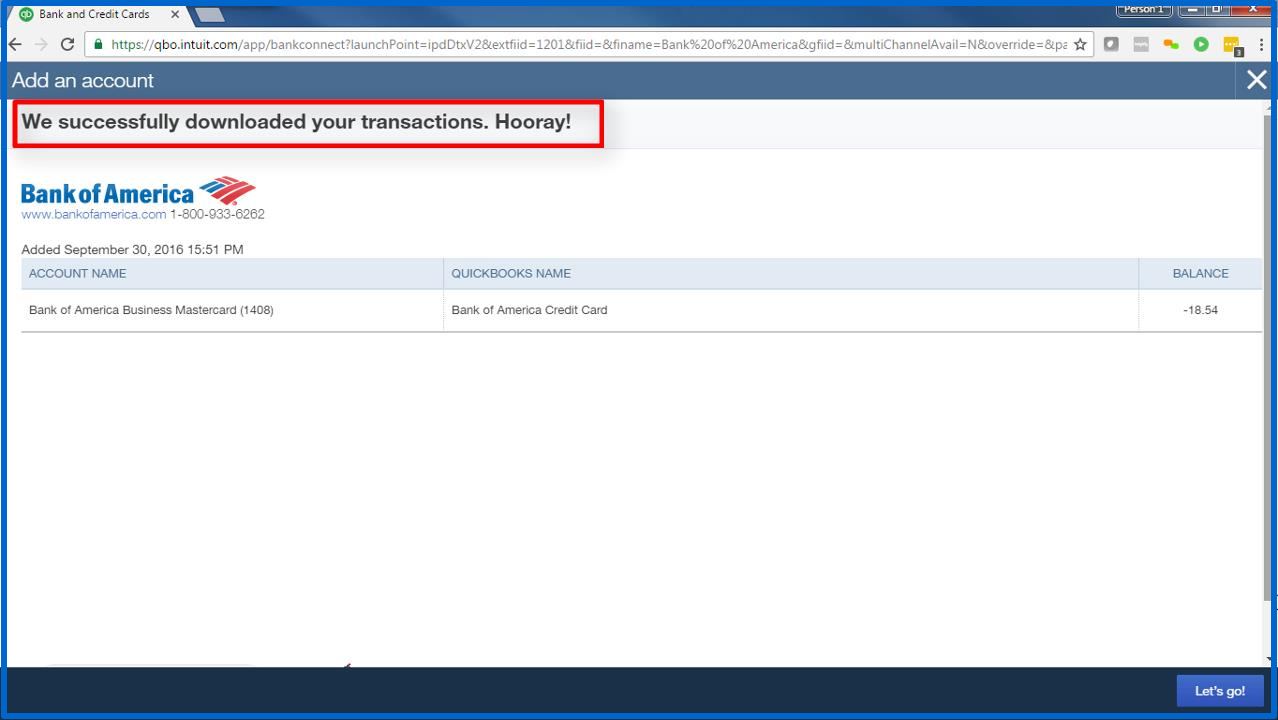
A window opens indicating that banking transactions were successfully downloaded.
Adding transaction to QBO
Once you have connected your financial institution to QBO, you can go to the Banking Center and start adding transactions. When you “add” transactions from the Banking Transactions Center, they are entered directly into QBO.
There are two types of transactions in the QBO Banking Center:
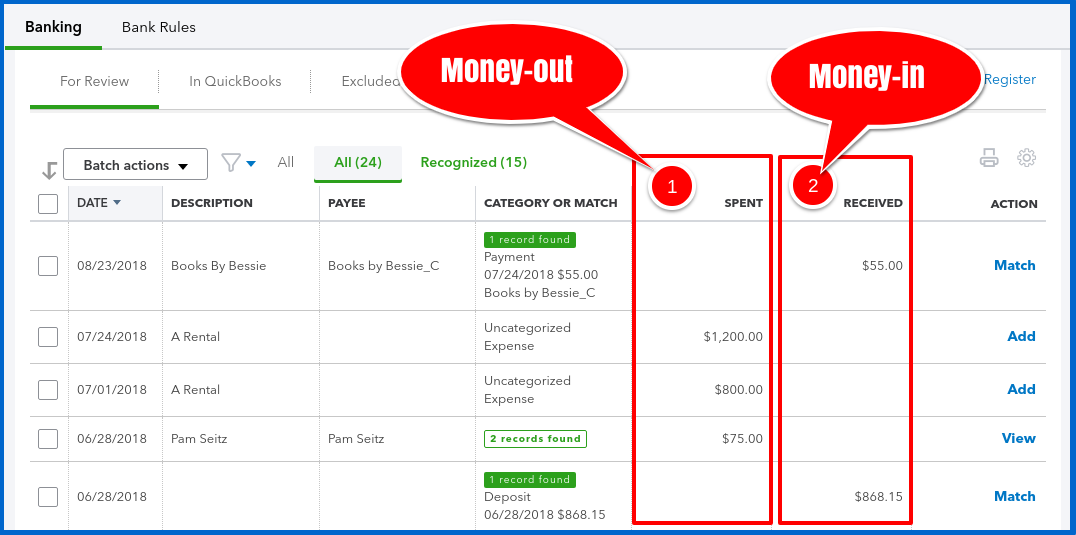
- Money-out transactions include checks, vendor bill payments, and credit card expenses. They will be found in the spent column.
- Money-in transactions include deposits of customer payments, sales receipts, and interest earned. They will be found in the received column.
Money-out transactions
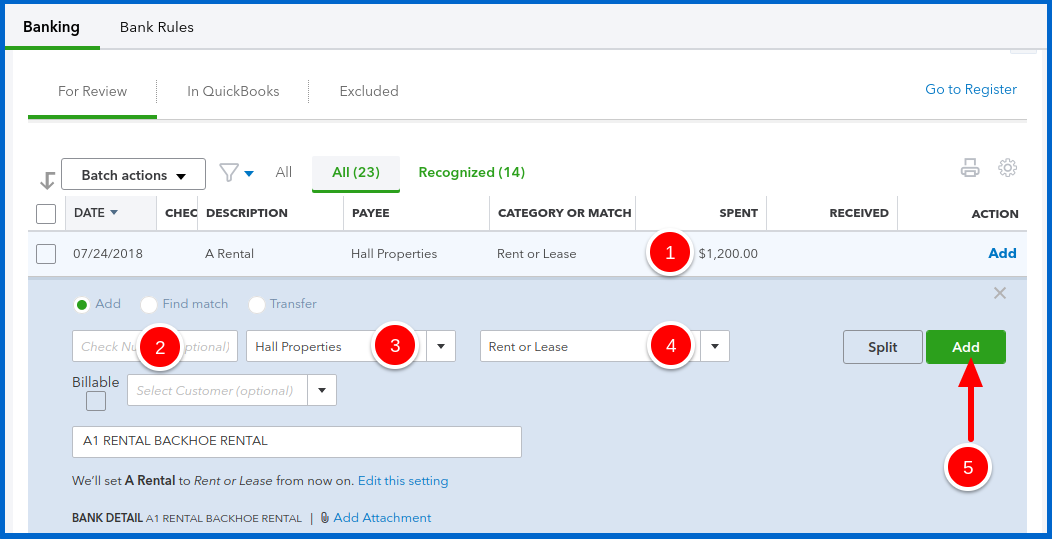
Let’s add a money-out transaction:
- Select a transaction with a balance in the Spent column.
- Enter a check number, if applicable.
- Select the appropriate vendor for this expense.
- Assign an expense account (for instance, if the vendor is Office Depot, the category would be Office Supplies).
- Finally, select add.
What about money-in transactions?
As a general practice, money-in banking transactions in QBO should generally be Matched. This means, that the transaction must already be entered in QBO.
So, you will need enter a customer invoice, record a customer payment received, and record a bank deposit, all from the Quick Create menu. THEN you must go the Banking Transactions Center Match the bank deposit to the corresponding transaction in the Banking Transactions Center.
Here is a video showing you how to enter an invoice, customer payment, and deposit:
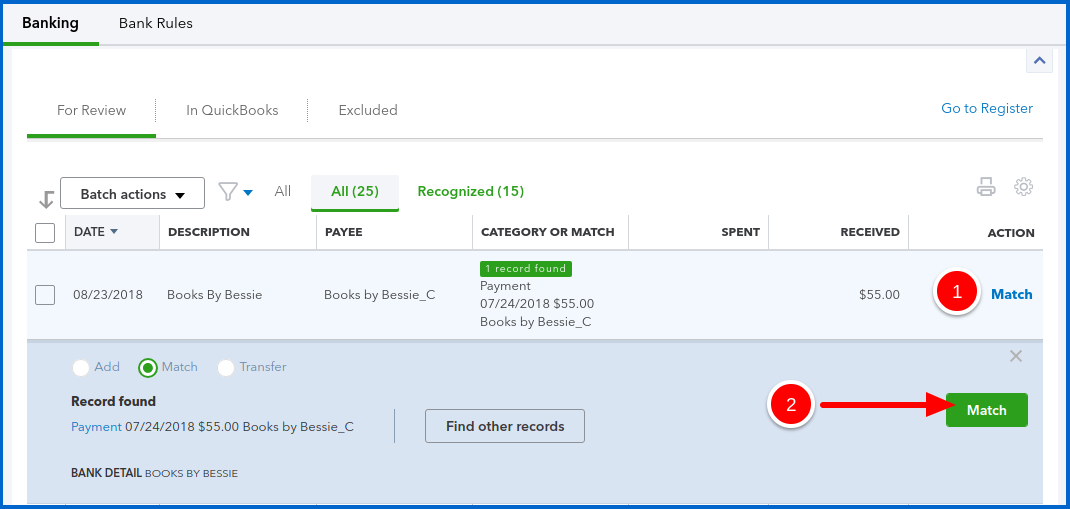
After you enter the invoice, customer payment, and deposit, you will Match the deposit in the Banking Transactions Center, as shown below:
Click “Match” on the right to match the transactions (or use Batch actions).
Closing
Using these quick ways or adding transactions in QuickBooks Online, you’ll be able quickly enter transactions into QBO, even if you have limited experience with QBO itself.
Also, here’s a time saving tip – download transactions every day – it will take you less than 5 minutes a day.





I love your website. It has really helped me out. Bank feeds still terrify me! If my client records a checks as a payment and then immediately uses a mobile depositing app to deposit the check into the bank. How would that come into the bank feed? Would I match it to the invoice or payment receipt or would I add it to the payment receipt?
Hi Christine,
I’m glad we can help.
For your question: Once your client makes a deposit using a mobile depositing app, wait for the deposit to clear the bank. Once the deposit clears the bank, it should show up in the bank feeds. In the meantime, you can record the payment received on the invoice and then record the customer payment as deposited. Once the deposit is recorded in QuickBooks and the actual deposit clears the bank, you can just match the deposit in the bank feeds.
If you have any other questions, feel free to join our Facebook group: https://www.facebook.com/groups/5minutebookkeeping/