On my last post, I discussed how to set up the products and services list in QBO . In this post, I’ll share my tutorial on how to set up inventory on QuickBooks Online.
What is inventory?
Inventory in QuickBooks Online consists of the items that you buy and sell and that you want to track as “inventory” for accounting purposes. For accounting (and tax purposes), inventory reflects the items that you have purchased but have not yet sold. For US taxes, you normally don’t get a tax deduction for inventory that you haven’t sold yet.
Should you track inventory in QBO?
Tracking inventory is an important step in QuickBooks Online. It requires an added level of tracking and it has several ramifications for bookkeeping and tax purposes. Also, not every business situation fits how inventory currently works in QuickBooks Online.
You should not track inventory if you do not have time to continually and properly track inventory when you receive it and when you sell it. Otherwise, QuickBooks Online will show negative or incorrect inventory quantities – which is incorrect.
If you have very specific or more sophisticated inventory needs, you need to look for an app at apps.intuit.com to find an integrated app that tracks inventory and/or manufacturing.
Getting started with inventory tracking in QuickBooks Online
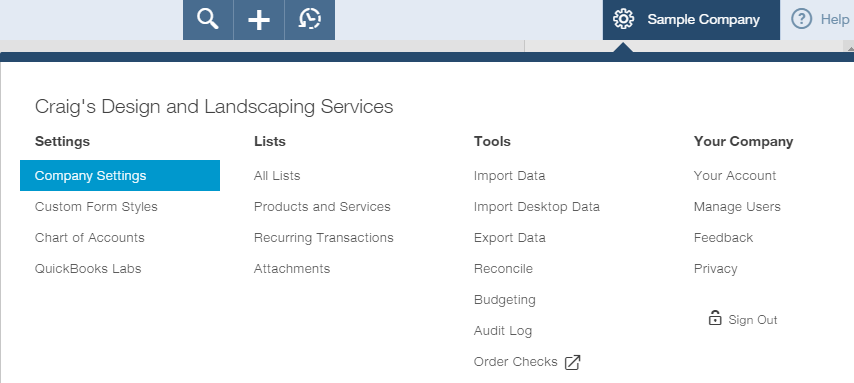
First, click on the Gear Icon on the upper right hand side and select Company Settings.
The Company Settings window will open. Click Sales on the left.
You need to make sure that inventory settings are turned on, as I’ll show you next.
- Show Products/Service column on sales forms – Adds a Product/Service column on sales forms so you can choose from a list of products and services to include. Be sure this feature is turned on.
- Track quantity and price/rate – Adds Quantity and Rate fields to sales forms so you can track this information for products and services. Be sure this feature is turned on.
- Track quantity on hand – Lets you track available stock for each product you sell and its related inventory costs. Be sure this feature is turned on.
Click Save when you are done.
How to find the products and services list in QBO
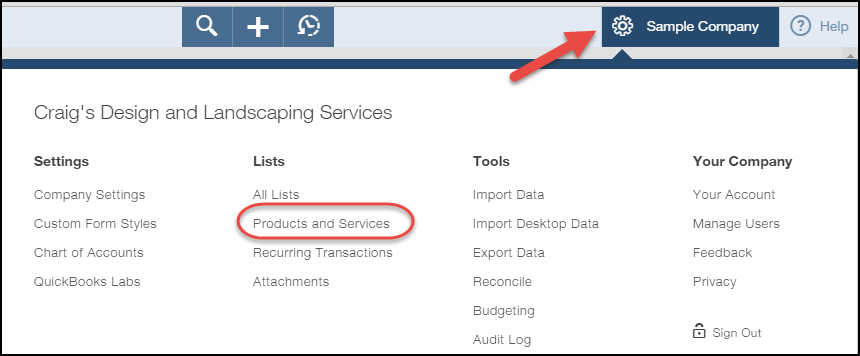
Click on the Gear Icon on the upper right and click on Products and Services.
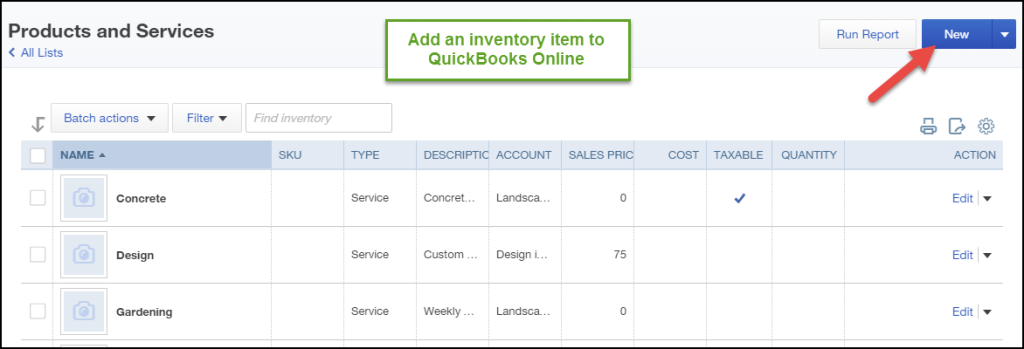
The products and services window will open.
How to add a new inventory item to QBO
From the products and services window, click New on the upper right.
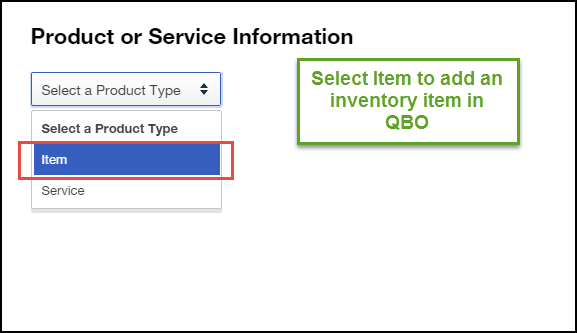
From the Select a Product Type – click on Item.
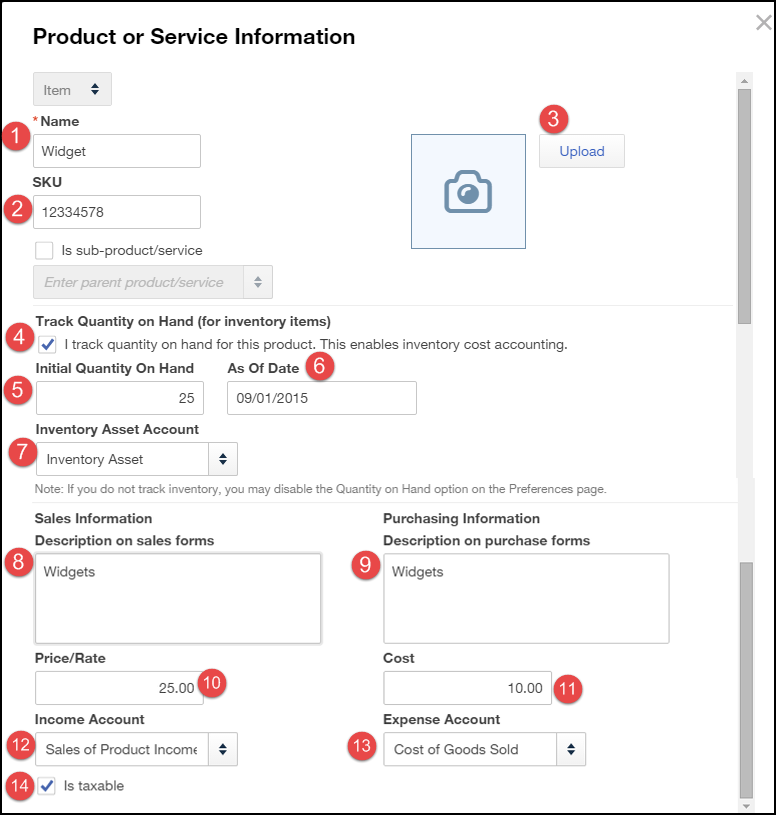
The Product or Service Information window will open.
- Enter the name of the item – such as widgets, etc. The name has to be a unique name. It can be a combination of letters and characters.
- Enter the SKU number if you will use SKU’s. Otherwise, leave it blank.
- Upload a picture of the item. This is a new feature that you can use to include pictures of your items in your inventory list.
- Track Quantity on Hand – click the box indicating that you track inventory for this item.
- Initial Quantity of Hand – If you have existing inventory, enter the quantity of inventory you have on hand. It’s a good idea to check with your accountant first to make sure that you set up your starting inventory quantities correctly.
- As of Date – If you have existing inventory, and you entered the quantity of inventory you have on hand, enter the initial start date of the starting inventory quantities. For example, if want to start tracking inventory as of January 1st, I would count my starting inventory quantities and enter them in QBO as of January 1st. I highly recommend that you talk to your accountant before setting up inventory in QBO. The “as of date” and inventory quantities are very important and have significant implications for tax purposes.
- Inventory Asset Account – Select Inventory Asset.
- Description on Sales Forms – enter the description of the item. This will show up on.
- Description on Purchase Forms – enter the description of the item. This will show up on purchase orders and vendor bills.
- Price/Rate – enter the sales price for each unit.
- Cost – enter the amount that it costs you to purchase each unit.
- Income account – very important! Make sure that you choose an “Income” account type. You can see the income type to the right of the account name. This is a common mistake that most people make – make sure you select the correct account.
- Expense account – also very important! Make sure that you choose a “Cost of Goods Sold” account type.
- Is taxable – click this field if you collect sales tax. Otherwise, leave this field blank.Click Save and Close.
How to edit inventory items in QuickBooks Online
From the products and services list, find the item you want to edit and click Edit on the right side.
Edit the fields as needed.
You cannot change an inventory item to a service item.
You can also edit the description, price/rate, income account, cost of goods sold account, or whether the item is subject to sales tax.
You can update the current inventory quantity on hand but I recommend that you talk to your accountant before doing this.
Click Save and Close.
How to delete inventory items in QuickBooks Online
From the products and services list, find the item you want to delete and click the down arrow on the right side.
Click Delete.
Be careful not to delete any inventory items that show quantities on hand. You should edit the quantity on hand first to zero out the quantity on hand.
How to filter the inventory item list and find inventory items in QuickBooks Online
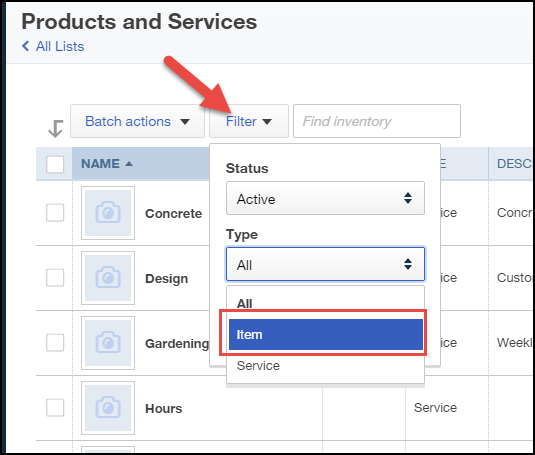
If you want to see only inventory items on the products and services list, simply click on Filter and select Item under Type. Click Apply.
To easily find an inventory item without scrolling down the list, simply enter the inventory name in the Find Inventory box.
How to view inventory quantities in stock in QuickBooks Online
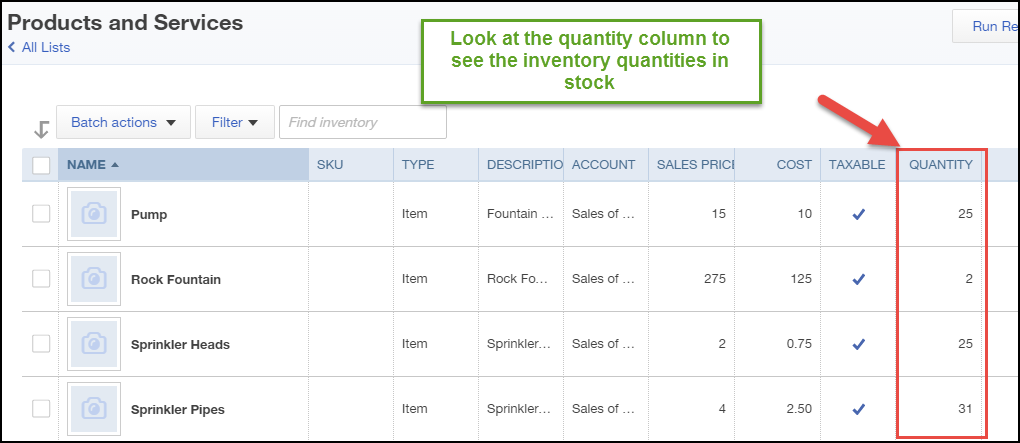
Do you want to see what inventory quantities you have in stock? Look under the “Quantity” column.
How to import inventory items into QuickBooks Online
If you have a lot of inventory items to set up you can save time by importing your item list. Click on the down arrow next to the New button on the upper right.
Click Import.
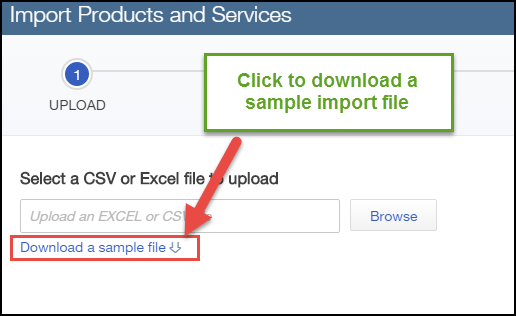
Click on Download a sample file to view a sample Excel file so you can see how to format the file and what fields you need.
Once you set up the import file in Excel, upload the Excel file, map the data to the data fields in QBO, and then import the data. Make sure that you format the Excel file exactly as the sample and that you enter the correct Income accounts, expense accounts, and inventory accounts. You may want to seek assistance from a Certified QuickBooks Online expert before importing inventory items.
Here’s a Slideshare post that you can download:
That concludes my tutorial on how to set up inventory in QuickBooks Online. From this post, you’ll be able to get started with setting inventory items in QBO. As I stated before, I highly recommend that you discuss setting up your inventory with your accountant or a certified QuickBooks Online ProAdvisor. That way, you can set up inventory correctly so that you don’t mess up inventory in QuickBooks Online.











[…] https://5minutebookkeeping.com/how-to-set-up-inventory-on-quickbooks-online/ […]
Can you upload photos for your inventory on the app for Ipad?
Currently, you can’t upload photos using the mobile app. You might try logging into your QBO account directly from your IPad’s Google Chrome browser to see if you upload pictures that way instead.
Thanks For Sharing