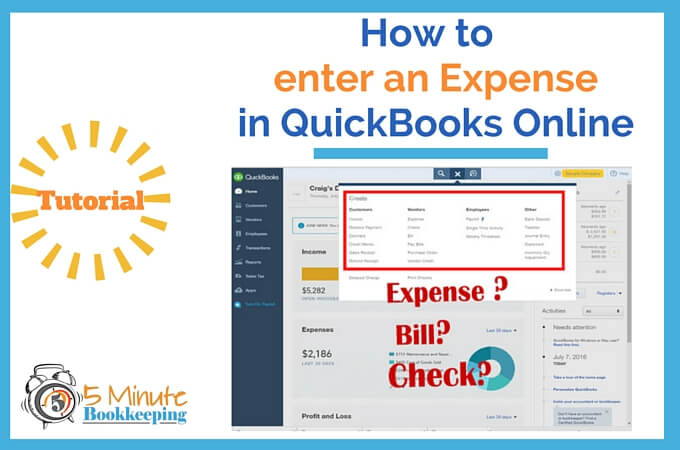
Have you ever wondered how to enter expenses in QuickBooks Online? Should you enter an expense as a Check, a Bill, or an Expense? Well, don’t worry. By the time you finish this tutorial, you’ll be crystal clear on what to do.
First, a story
I recently worked with a client – we’ll call her Mary. Mary felt very insecure and confused because she didn’t know if she was using QuickBooks correctly. She expressed to me her frustration and how hard it has been for her to work with other accountants – she felt that they were talking down to her.
I helped Mary to get her books cleaned up. I also showed her how to avoid the most common mistakes untrained users make. Mary had a question for me – when should she use an Expense in QuickBooks Online? I thought that was a great question!
So, thanks to Mary, I’ll share my expert tips so that you too can know when to use Expenses in QuickBooks Online and use QBO with confidence.
What’s an expense in QuickBooks Online?
So first, let’s have a clear understanding about what an expense is in QuickBooks. What exactly is an expense and when do we need to use it in QuickBooks Online?
An Expense is generally anything that your company spends money on to keep it up and running. Examples of expenses are rent, phone bills, website hosting fees, office supplies, accountant fees, trash service, janitorial fees, etc.
QuickBooks terminologies can be sometimes confusing…
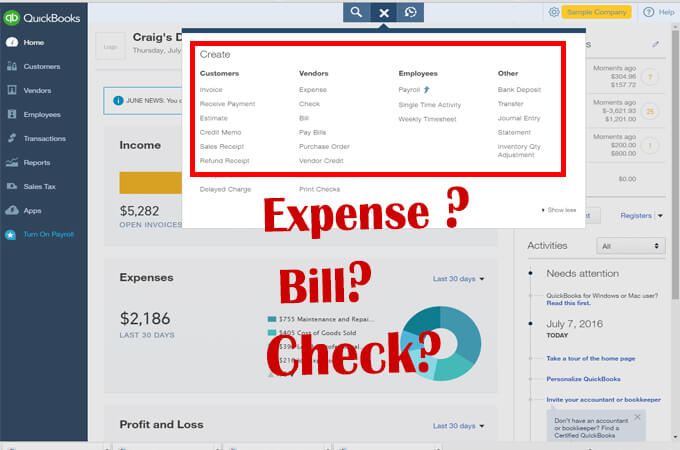
Bill vs. Expense vs. Check
Whatever transaction you enter in QuickBooks will surely affect your accounts. It is always better to do it right the first time!
To avoid any confusion between between bills, expenses and checks, I will explain each one.
Bills are invoices from vendors that are to be paid later. As an example, when you receive a bill from your vendor for a product or service and it is not due till the end of the month. Here is a link to my blog post on how to enter vendor bills.
Use Check to record manual checks. See my post on How to Enter a Check in QuickBooks Online.
On the other hand, use Expense to record all other bank transactions (like service charges and debit card transactions), and credit card transactions (if you are not downloading them from your credit card account in the Bank Feeds), and petty cash transactions.
Now that you know what an Expense is, let’s go over the actual steps on how to enter an expense on your QuickBooks Online!
Here’s how to enter an expense:
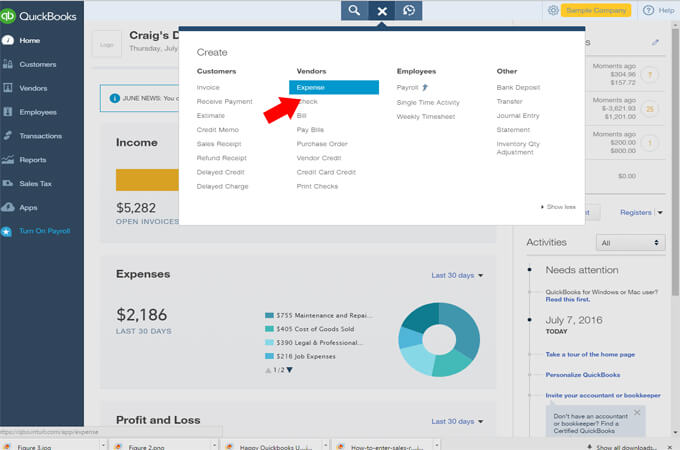
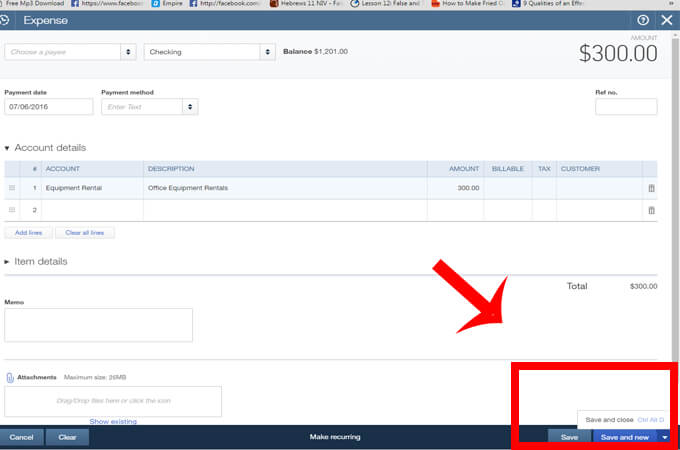
- Click the plus sign icon (+) to bring up the transaction menu page. Under the category for Vendors, select Expense.
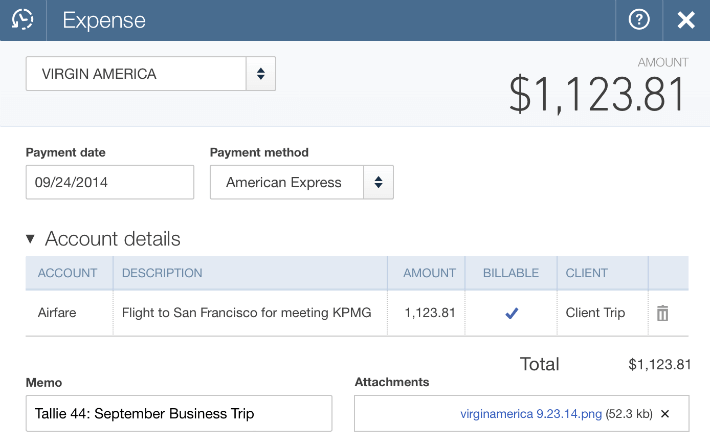
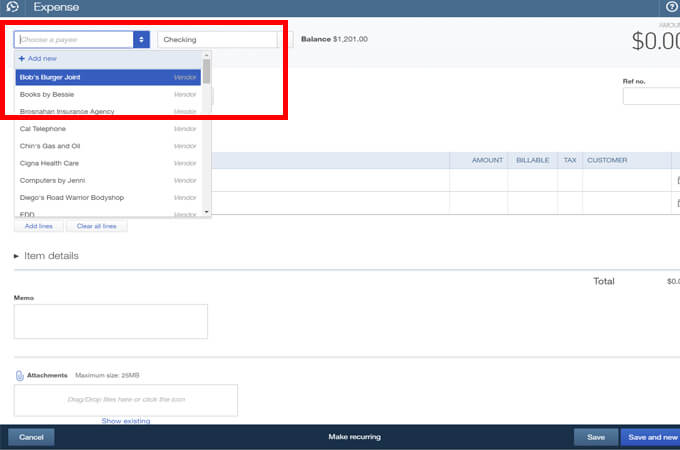
2.You will now see the enter Expense Window. Select a Payee for the expense. If it’s a new payee, you can entere their name in the field and click Add.
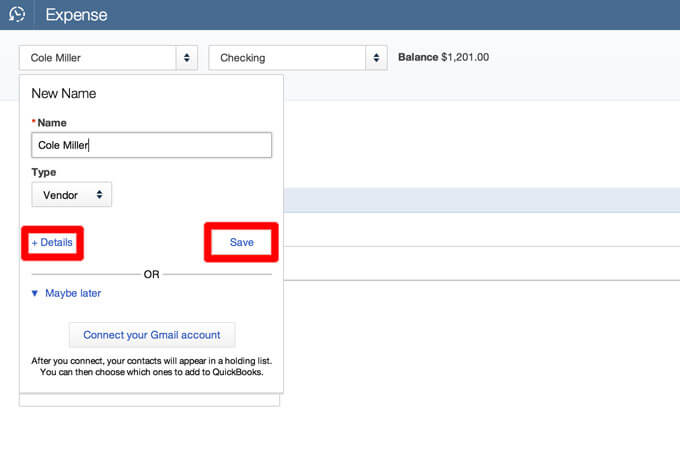
If you entered a new payee and you would like to add more details, you can click +Details to add more information or Save to do it later.
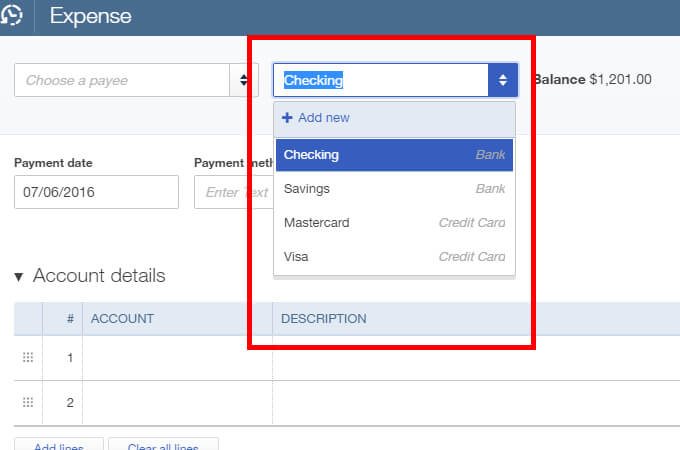
3. Next step is to choose the account the money for this expense came from. If you’re using a debit card, remember that you must choose a Checking Account, even if the card has a Visa or MasterCard logo.
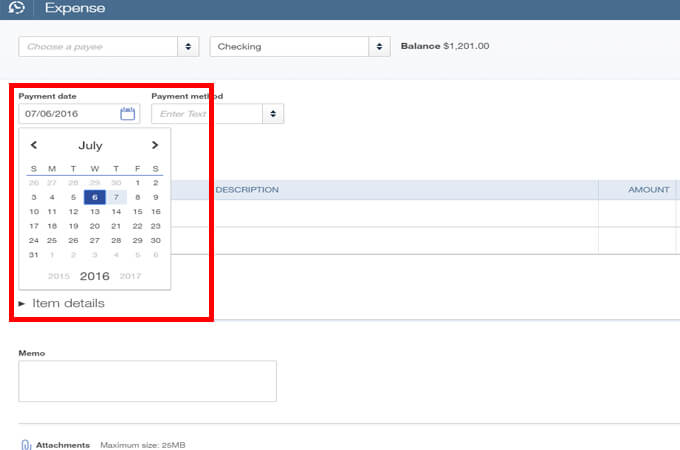
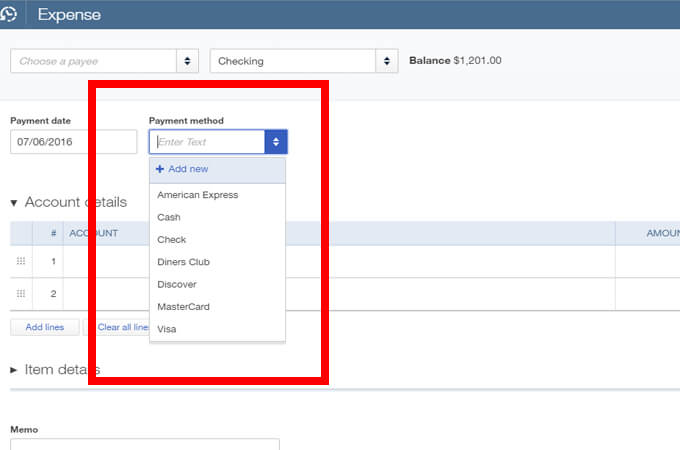
4. Next, enter the Payment date – the date you made this purchase.
5. After entering the date, the next step is to enter the Payment method for this expense. You can select cash, check or credit card. If the payment method that you used is not in the options, simply type in the payment method you used for this expense in the Payment method field and click Add new.
6. Choose a category for this expense. Under Account, choose the account category from the chart of accounts. If it’s a new category of expense, you can always type in the name of the category in the Account field and click Add new.
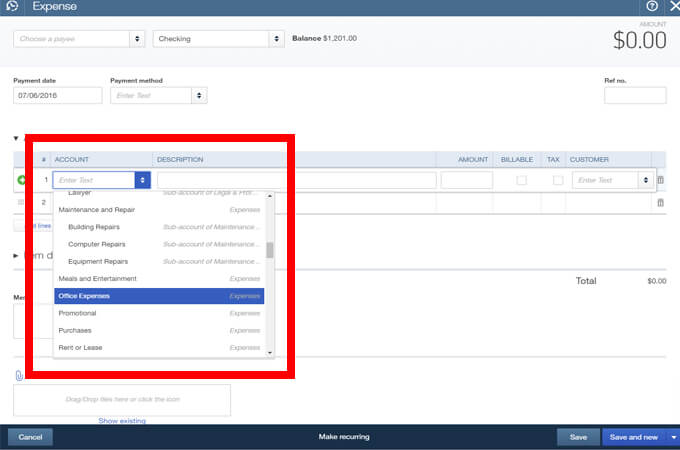
If you bought items or services from different categories with this one particular Expense, enter each category and the amount you spent on these items on separate lines. You can click Add lines to add more lines if you need to add more categories to your Expense.
7. To be more detailed with your purchase, you can add more information in the Description.
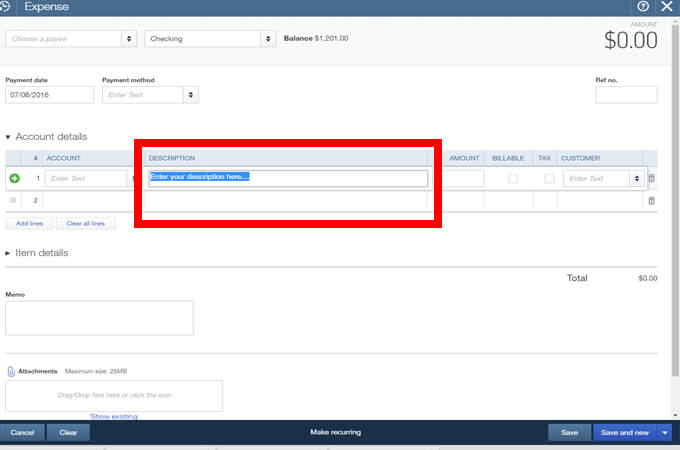
You can also add notes in the Memo field for additional information. If you need to add more details regarding the expense.
Expert Tip: You can attach a picture of a receipt or a PDF file by clicking on Attachments. It will allow you to upload and attach file to the Expense.
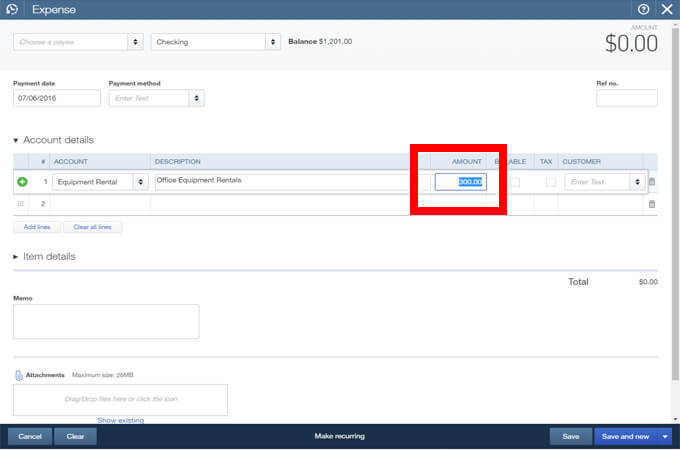
8. Enter the amount of the expense in the Amount field.
9. Once you entered all the needed information in the field, Click Save and New to save this expense and start another one, or Save and Close if you’re done creating expenses. As simple as that!
Just follow these steps to add an expense to your QuickBooks Online!
More expert tips
To save the most time, you should connect your bank and credit card accounts to QuickBooks Online so that transactions are automatically downloaded into QBO. This will save you lots of data entry time! See my blog post on Reconciling accounts in QuickBooks Online.
Use Expenses in QuickBooks Online for transactions that are not downloaded from your bank and credit card accounts – like petty cash transactions.
Closing
Congratulations! You have learned how to enter expenses in QuickBooks Online. If you find these tutorials helpful, please share these posts with others. Have you signed up for our blog? You’ll get all the latest tutorials and tips. Have a great week!


This is clear, simple and easy to follow, thank you so much!!
Not sure if you still monitor this but when I follow these instructions it keeps loading the last transactions to that Payee in the Account Details and I cannot figure out how to create a new entree for the same payee. Keeping all transactions together for that Payee would not be so bad but it seems to always save them under the payment date of the last entry.
Check your settings. Go to the Gear Icon. Select Account and Settings. Click Advanced (on the left. Find the “Automation” section and turn off the option to “Pre-fill forms with previously entered content”. Click Save.