Hi everyone! It’s Christmas time! Are you ready? Christmas is so much fun but we do tend to spend quite a bit more money during the holiday season. I’m really excited because I’m almost done with all my Christmas shopping. In this post, I will show you how to enter a check in QuickBooks Online.
When do you enter a check vs. enter a bill in QuickBooks Online?
This can be a little confusing in QBO. In prior tutorials I have shown you how to enter vendor bills, pay vendor bills, and print checks. In this tutorial, I will show you how to enter a check in QuickBooks Online “after the fact” – meaning that it’s a check you wrote for a bill that has not been entered in QBO.
Enter a check in QuickBooks Online
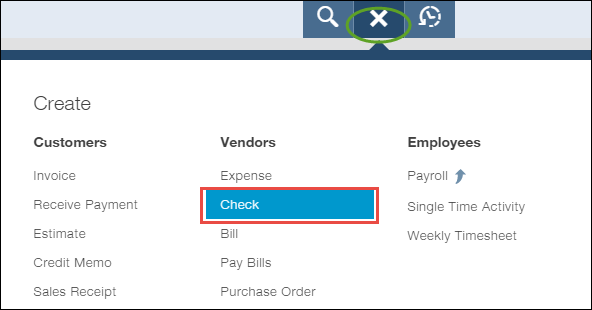
To enter a check for a payment you have made, click on the Create (+) menu at the center top and select Check.
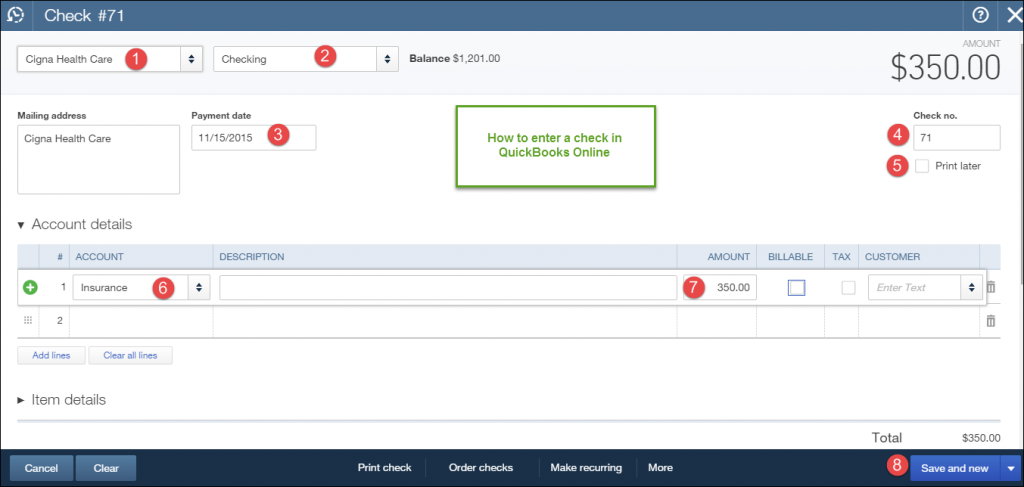
The Check window will open.
- Enter the vendor name or select it from the vendor list.
- Select the bank account to post the payment to.
- Enter the date of the payment.
- Enter the number of the check you used. You can also enter “ACH” or “Wire Transfer” or “EFT” if you made the payment electronically.
- Make sure that “Print later” box is unclicked.
- Enter the account category from the chart of accounts. In this example, we are using Insurance Expense.
- Enter the amount of the check.
- Click Save and new or Save and Close.
Tips
I like to enter checks in QuickBooks Online as soon as I write them. Why? Because, when checks download from the bank, the transactions details don’t show who you wrote the check to. You are left to guess or to look up the check image by logging into your online banking, which takes extra time.
As I already mentioned above, you can also enter electronic payments (ACH, wires, and EFT’s) using the Check window. Just enter “ACH” or “Wire Transfer” or “EFT” in the “Check No.” box.
What to do when you want to enter a check for a bill that was already entered
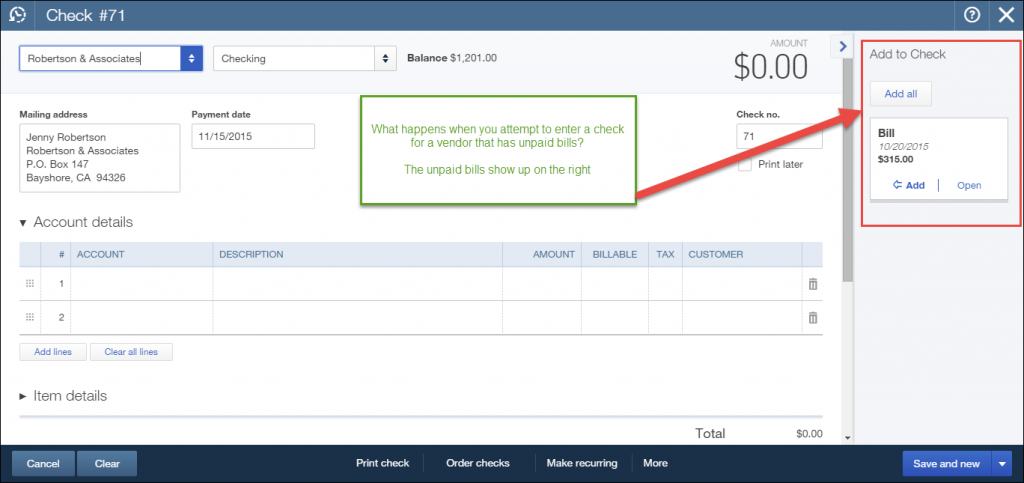
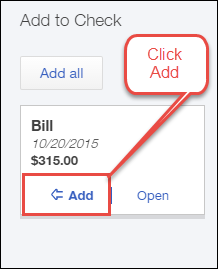
What if you already entered a vendor bill for a particular vendor and now you’re trying to enter a check using the Check window? Normally, if you entered a vendor bill you should use the Pay Bills window to enter the payment and not the Check window. Does that screw up things in QBO? No worries. QBO is smart enough to show you have you have already entered a vendor bill. Any unpaid vendor bills will show up on the right hand side in the “Add to Check” box.
Click Add below the bill that you want to match with the check you are entering.
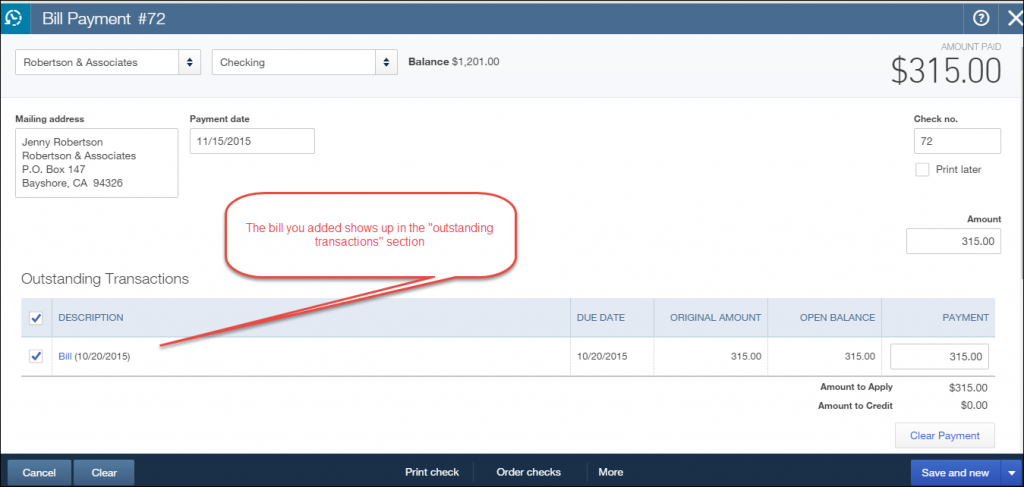
The bill you added shows up in the “outstanding” transactions section and it is now matched up to the check that you want to enter. Save the transaction when you are done.
Final words
That’s our tutorial this week on how to enter a check in QuickBooks Online. Will you do me a favor? Will you share these posts with others? And, if you haven’t done so already, will you subscribe to our blog? I would really appreciate it. Have an excellent week!
