Are you ready to move your bookkeeping to the cloud? If you have been using QuickBooks Pro or Premier, it may be time for you to use QuickBooks Online so that you can have anytime anywhere access to your books and take advantage of the latest apps. I’ll show you how to convert QuickBooks to QuickBooks Online.
Import your data into QuickBooks Online
Transferring your data to QuickBooks Online is easy, and it won’t affect your original copy of the file. Be sure to follow these steps before you switch.
Make sure you install the latest software updates in your version of QuickBooks desktop.
To do that, go to Help
Click Update QuickBooks
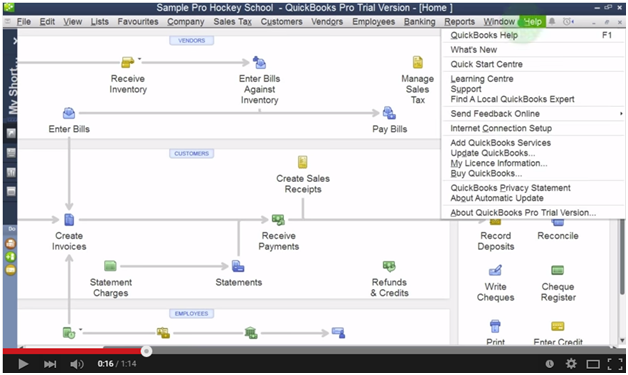
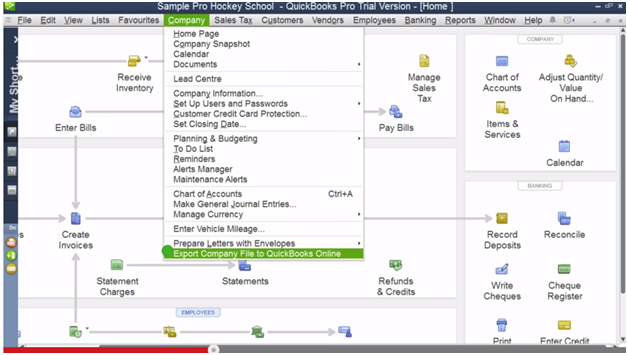
Once the update is complete, click the “Company” Menu, then choose “Export Company File to QuickBooks Online”
Are you a Mac user? If using QuickBooks on Mac, go to File, then export, then choose QuickBooks Online.
Create a QuickBooks Online account or select an existing company
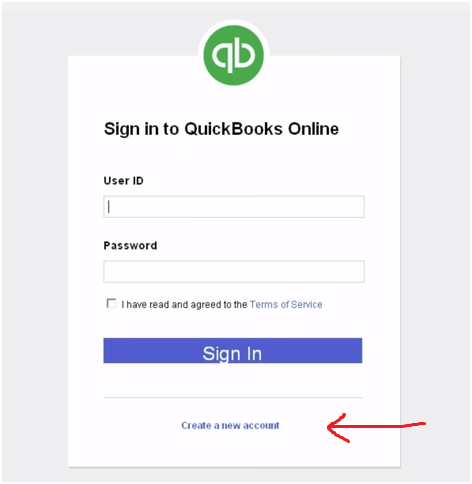
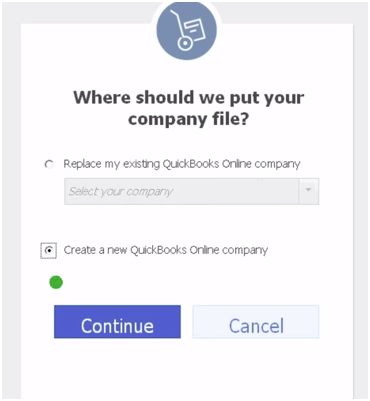
If you don’t have a QuickBooks Online account, you can create one. Click “create a new QuickBooks Online company”, and click Continue.
If you have already created a QuickBooks Online account, sign in and select the company you want to export to. Just be sure to select the right one.
Be careful! Importing data into an existing company file will erase any data that you may have already entered!
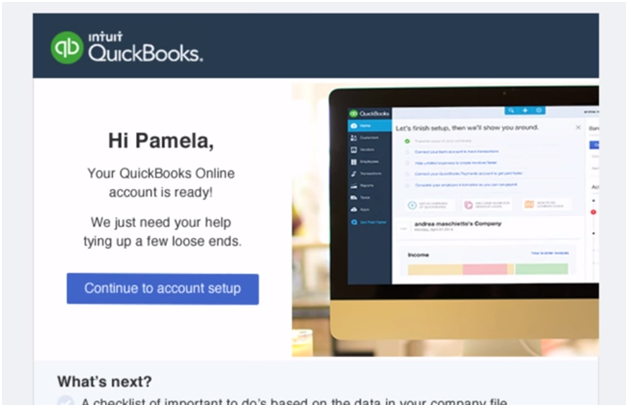
Transferring a data usually takes only about 10 minutes. When it’s done, you will receive a confirmation email with a link to sign in.
Make sure everything imported properly
Sign in to QBO. Now, you will need to run some reports to make sure everything converted properly.
- Run a Profit & Loss Report for all dates and a balance sheet for all dates in both QBO and QuickBooks.
- Make sure that all the totals match.
- Call QBO technical support if they don’t.
Things to consider before converting from QuickBooks to QuickBooks Online
- QuickBooks Online allows you to import data from QuickBooks within the first 60 days of creating your QuickBooks Online account. When this data is imported, it replaces any data in the QuickBooks Online account.
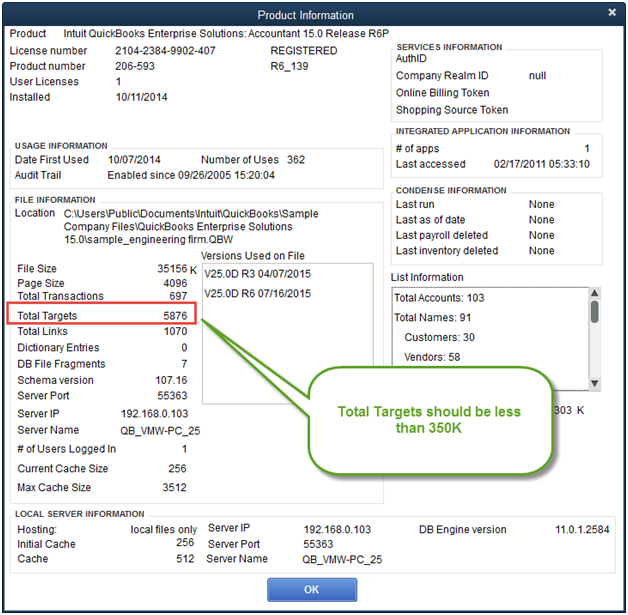
- Make sure that your file size is not too big to import into QBO.
- From your QuickBooks desktop file – click F2. The Product information window will open. Confirm that the “Total Targets” is less than 350K.
- Make sure that your data is healthy for a conversion:
- From your QuickBooks desktop file, go to:
- File > Utilities > Rebuild Data, then
- File > Utilities > Verify Data
- Confirm there are no errors or file corruption
- Most QuickBooks data can be imported, but there are some limitations. Currently, you cannot import:
- Memorized transactions
- Customized invoice templates
- Inventory
- Sales tax rates
- Budgets
- Custom fields
- Price levels
- International versions of QuickBooks cannot be imported into QBO’s United States version.
- Also, payroll data imports as checks into QBO and not paychecks. You will need to set up payroll in QBO if you will be processing payroll in QBO. Be sure to allow for time to set up payroll in QBO before you run the next payroll.
If you have a large file or data that will not import into QuickBooks Online, I recommend that you seek the help of a certified QuickBooks Online Proadvisor to help you condense your data file and make an assessment whether your file is a good candidate for converting from QuickBooks to QuickBooks Online.
Last words of advice
I know that you are probably very eager to get your data up in the cloud and start working with QuickBooks Online. I encourage you to take your time and to make sure that your conversion is successful before you start using QuickBooks Online. This way, you’ll get off to a good start with QBO and you’ll be confident that your data converted correctly.
Here’s a Slideshare post for you
