Hello again. I want to thank you for faithfully keeping up with all of our QuickBooks Online tutorials. I have received positive feedback from many of you and I’m so glad that you find these tutorials helpful. In this post, I’ll show you how to add vendors in QuickBooks Online.
What are vendors?
Vendors are the people you buy things from. You may also refer to them a suppliers or contractors. Payments to vendors are “money out” transactions.
Adding vendors to the vendor list
Even though you can add vendors to the vendor list in QBO in several different ways, I’ll discuss how to add vendors from the Vendor Center.
From the Vendor Center, you can add vendors one at a time or by importing a list.
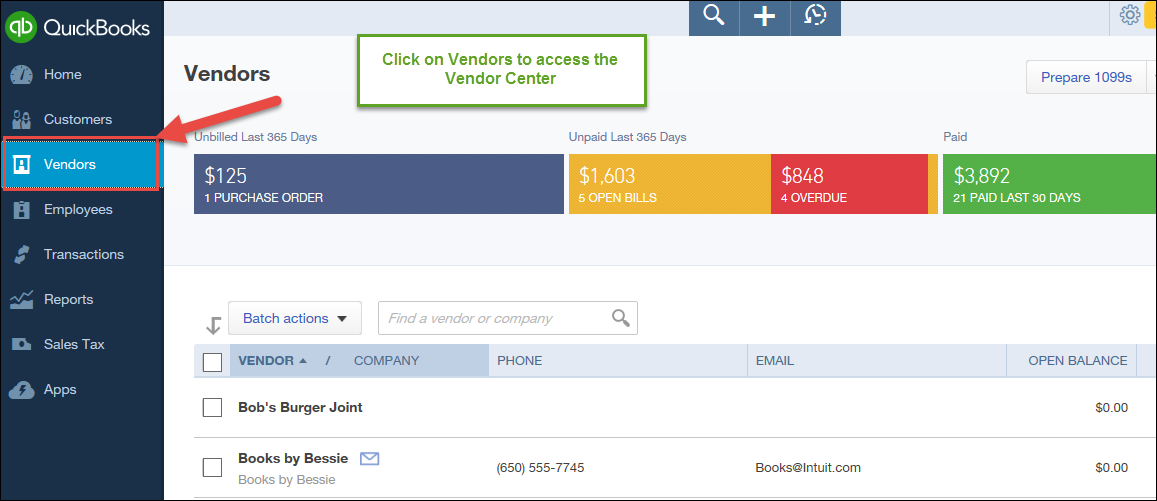
To access the Vendor Center, click on Vendors from the Left Navigation bar.
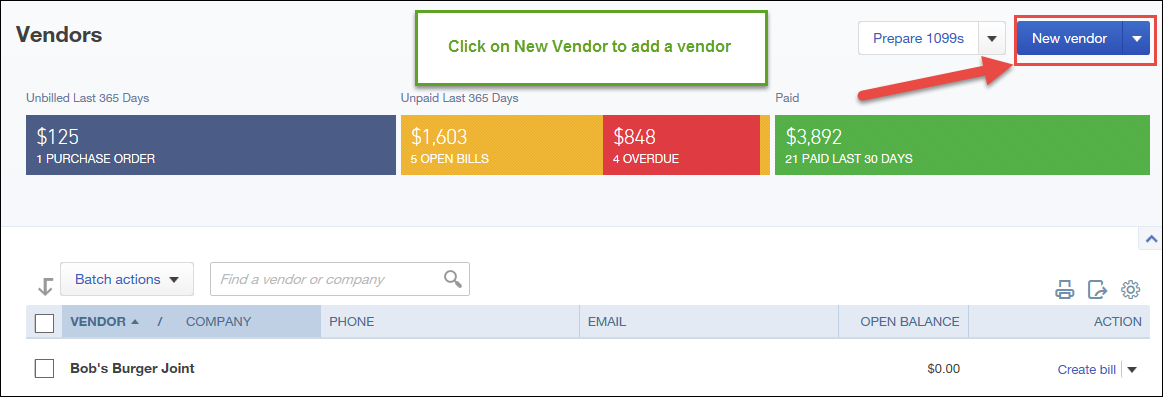
Adding one vendor at a time in QuickBooks Online
From the vendor center, Click New Vendor on the Upper Right.
The Vendor Information window will open.
How to add vendor information in QuickBooks Online
The vendor Information window is where you enter all of the vendor’s information.
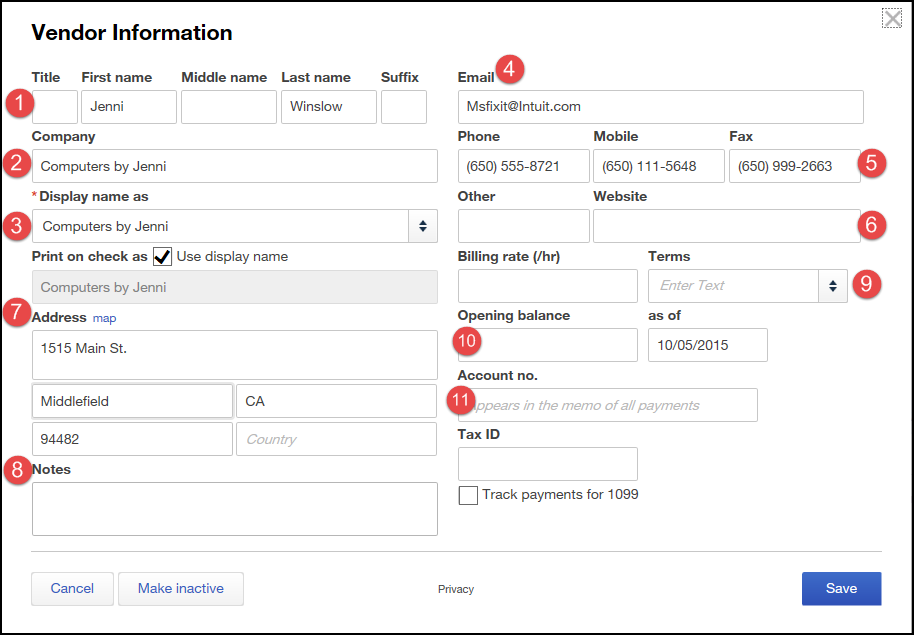
- Enter the vendor’s first and last name.
- Company – enter the vendor’s company name.
- Display name as – you can choose how you want the vendor’s name to display in the vendor list in QBO.
- Email – enter the vendor’s email address.
- Phone Mobile / Fax – enter the vendor’s phone numbers and fax number.
- Website – enter the vendor’s website address – this is an optional field.
- Address – enter the vendor’s address.
- Notes – enter any notes that you want to keep track of for this vendor.
- Terms – enter the vendor’s payment terms. For example, Net 30 means that payment is due 30 days from the date of the vendor’s bill.
- Opening balance – I recommend that you leave this balance blank. If you are new to QBO and you need to enter a balance owed to a vendor you should enter the vendor bills owed to the vendor using the Quick Create (+) sign.
- Account number – enter the vendor’s account number. This is helpful for utility payment, for example. The account number will show up on the memo on the check.
Click Save when done.
How to track a 1099 vendor in QuickBooks Online
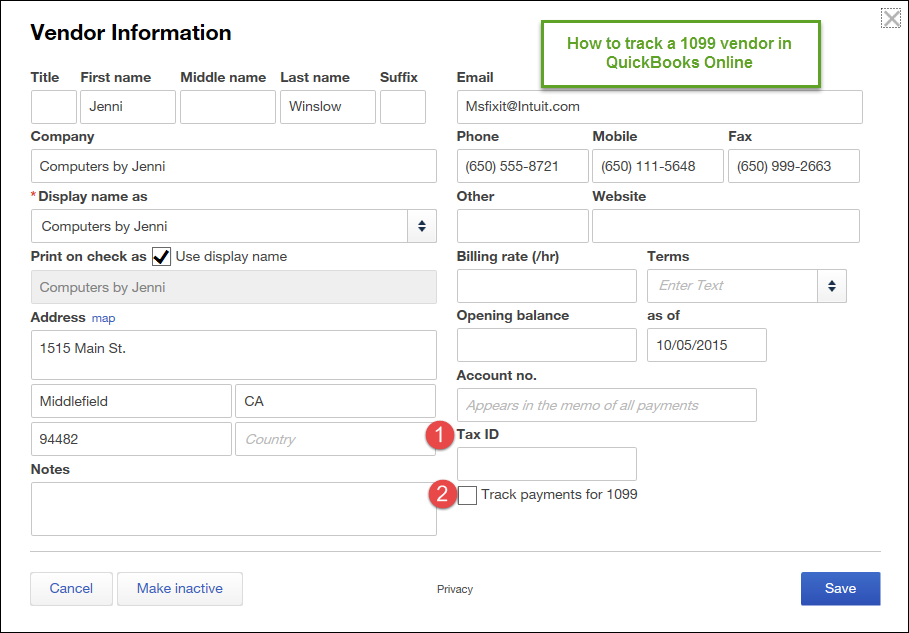
Do you pay 1099 vendors and need to keep track of 1099 payments? You can easily do this in QBO but you need to have a subscription to QuickBooks Online Plus.
From the vendor information window, (1) enter the vendor’s tax ID, and (2) check the box that says “Track payments for 1099”.
How to set up to print a check to a vendor with a different name
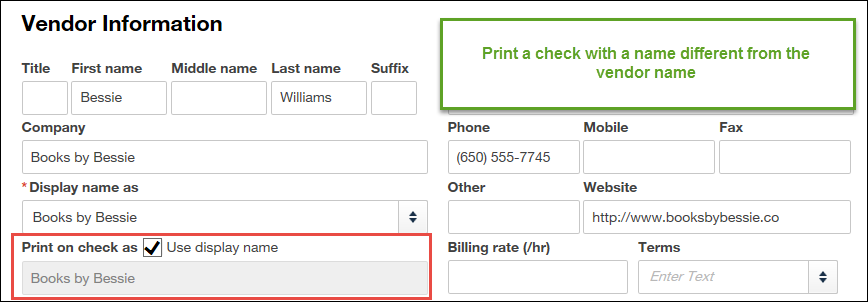
Do you ever have vendors that you track in QuickBooks Online by their name but they want you to pay them using their company name? In this example, Bessie Williams wants us to print checks to her using the company name “Books by Bessie”. Simply, unclick the box next to “Print on check as” and enter the company name that you wish to use. Then click the box next to “Print on check as”.
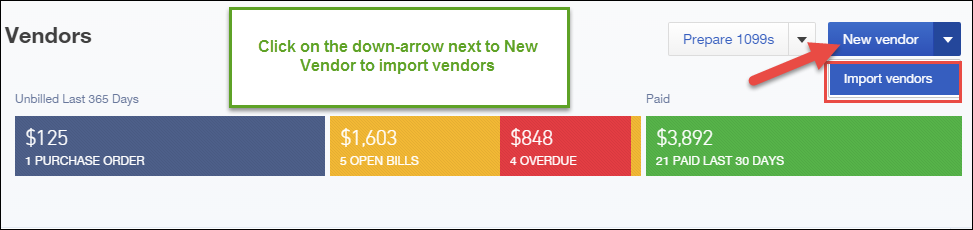
How to import a vendor list into QuickBooks Online
If you have a lot of vendor to set up you can save time by importing your vendor list. Click on the down arrow next to the New vendor button on the upper right.
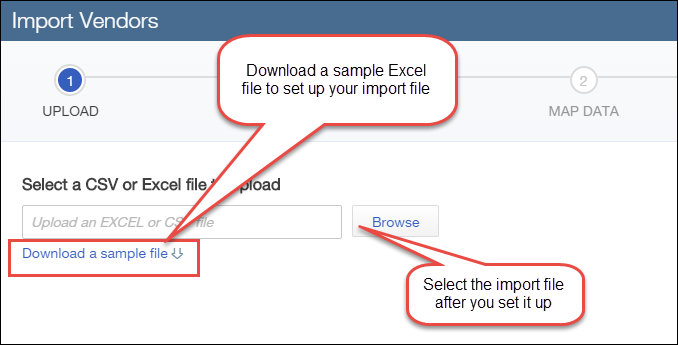
Click Import vendors.
Click on Download a sample file to view a sample Excel file so you can see how to format the file and what fields you need.
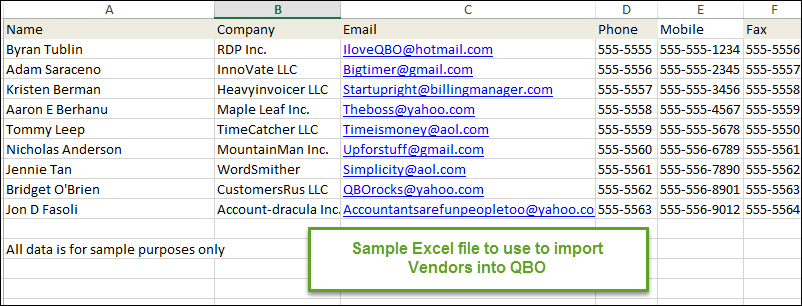
Make sure that you format the Excel file exactly as the sample. As a reminder again, I recommend that you leave the Opening balance fields blank and that you enter the any open (unpaid) vendor bills later.
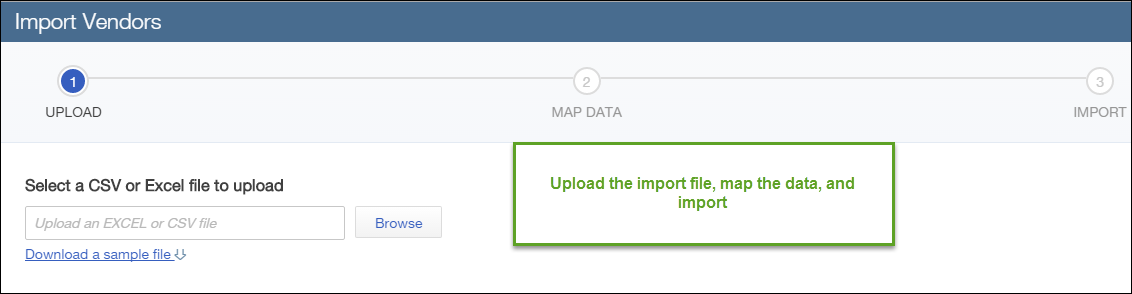
Once you set up the import file in Excel, upload the Excel file, map the data to the data fields in QBO, and then import the data.
Final comments
Adding vendors to QBO is relatively easy. Just follow the steps and you’ll build your vendor list in no time. That’s all for this post on how to add vendors in QuickBooks Online. Stay tuned for more step-by-step QBO tutorials and remember to subscribe to our content.