One of the most important things that new QBO users want do is to set up is the customer list. That’s because they’re eager to invoice customers quickly. In this post, I’ll cover how to add customers in QuickBooks Online. I’ll take you through a step-by-step tutorial so that you can learn how to add customers the right way and, of course, I’ll share those little known QBO tips with you.
What are customers?
Customers are the people who buy things from you. You may call them clients, patients, members, etc.
There is a Company Setting in QBO that allows you to choose to choose the name you will use to refer to your customers (Clients, customers, donors, guests, members, patients, tenants). It is the Customer Label setting. You can access this setting from the Gear Icon (upper right) < Company Settings < Company < Customer label.
Adding customers to the customer list
You can add customers to the customer list in QBO in several different ways. In this blog post I’ll discuss how to add customers from the Customer Center.
From the Customer Center, you can add customers one at a time or by importing a list.
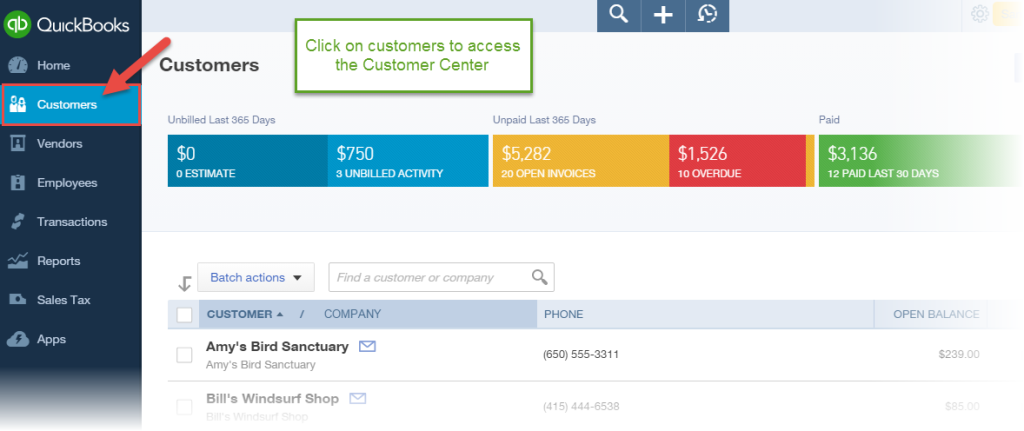
To access the Customer Center, click on Customers from the Left Navigation bar.
Adding one customer at a time in QuickBooks Online
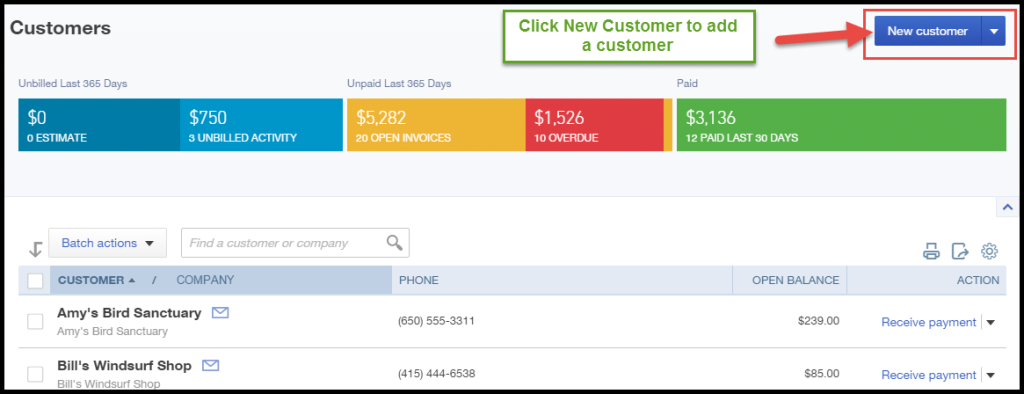
From the customer center, Click New Customer on the Upper Right.
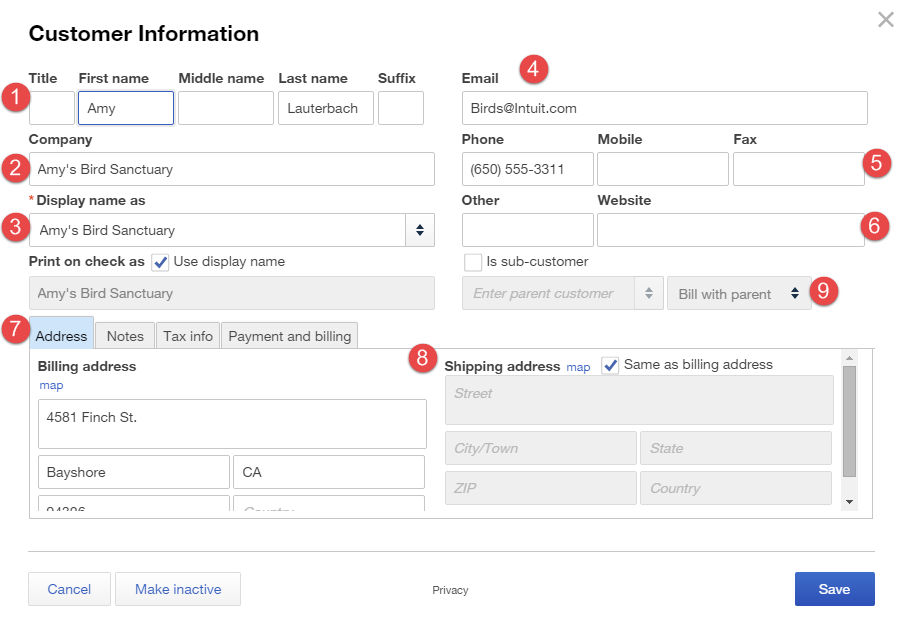
The Customer Information window will open.
How to add customer information in QuickBooks Online
The Customer Information window is where you enter all of the customer’s contact information.
- Enter the customer’s first and last name.
- Company – enter the company name.
- Display name as – you can choose how you want the customer’s name to display in the customer list in QBO.
- Email – enter the customer’s email address where you want to send their invoice.
- Phone Mobile / Fax – enter the customer’s phone numbers and fax number.
- Website – enter the customer’s website address – this is an optional field.
- Billing address – enter the customer’s billing address.
- Shipping address – enter the customer’s shipping address (if you ship goods to your customer).
- Is Sub-customer – choose the “parent” customer from the list and indicate whether you want to invoice the sub-customer with the parent. Use this feature if you are setting up a job or project under a main customer.
How to add customer notes in QuickBooks Online
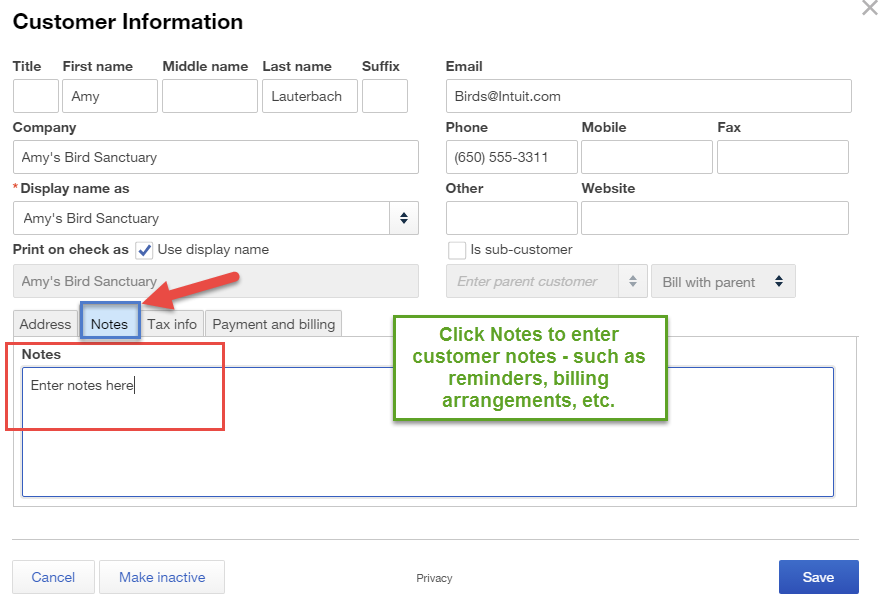
Click on the Notes tab to enter customer notes. You can enter billing notes, collection notes, additional contact information, or anything you need to enter. I recommend that you enter the current date before the notes – this way you’ll track when you entered the note. For example: “2015-09-15: Contacted client about past due invoice”.
How to add customer sales tax information in QuickBooks Online
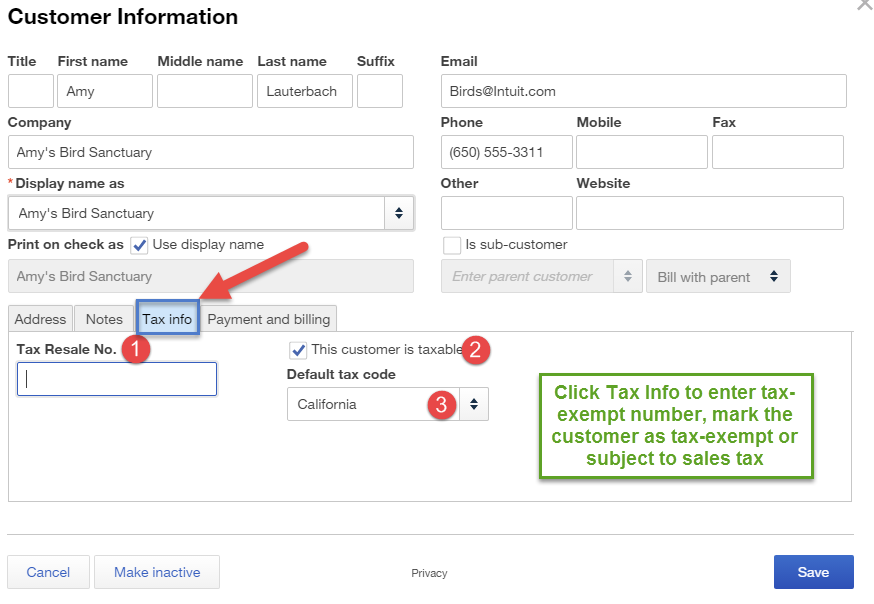
Click on the Tax info tab to add customer sales tax information – such as whether they are tax-exempt or subject to sales tax.
- Tax Resale No – enter the customer’s resale number if they are tax-exempt for sales tax purposes.
- This customer is taxable – click this box if you will collect sales tax from the customer (meaning they are not exempt from sales tax).
- Default tax code – select the sales tax code that applies to this customer.
How to add customer payment and billing information in QuickBooks Online
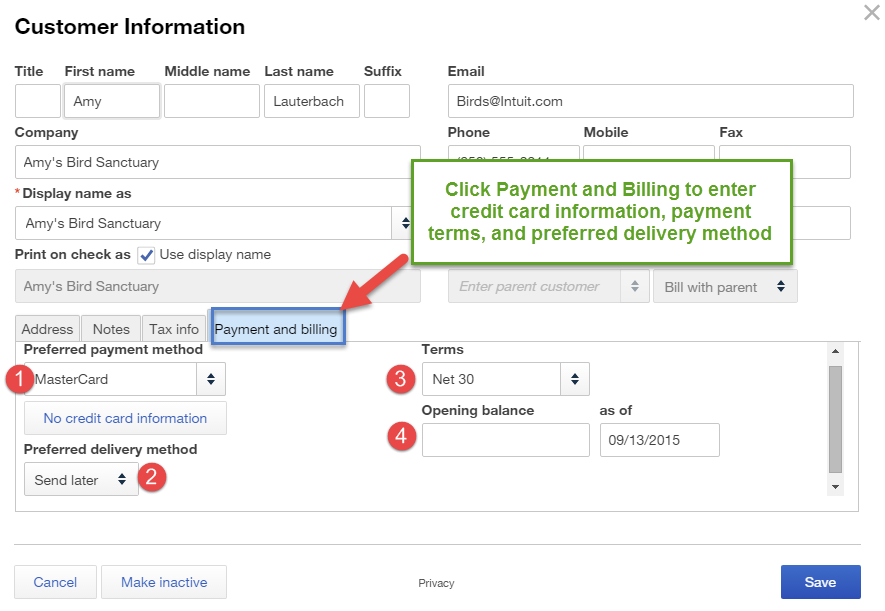
Click on the Payment and Billing tab to enter customer and billing information, such as credit card information, payment terms, and preferred delivery method.
- Preferred payment method – Enter your customer’s preferred payment method – cash, check, credit card, etc. If you want to keep your customer’s credit card information on file go ahead and select the type of credit card and enter the credit card information.
- Preferred delivery method – Select “Print Later” or “Send Later”. If you will be emailing invoices then you should select “Send Later”.
- Terms – select or add the payment terms you have extended to your customer. Net 30 means that the payment is due from the customer 30 days from the date of the invoice.
- Opening balance – I recommend that you leave this field blank. What if your customer owes you for invoices that you haven’t yet entered in QBO – how do you enter those balances? I recommend that you enter the invoices separately in QBO and that you do not enter anything in Opening Balance. You may want to consult your accountant if you have questions about entering opening balances for customers.
Click Save when done.
How to import a customer list into QuickBooks Online
If you have a lot of customers to set up you can save time by importing your customer list. Click on the down arrow next to the New button on the upper right.
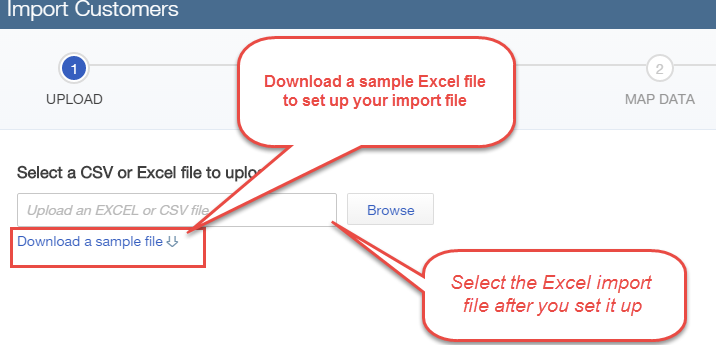
Click Import customers.
Click on Download a sample file to view a sample Excel file so you can see how to format the file and what fields you need.
Make sure that you format the Excel file exactly as the sample. As a reminder again, I recommend that you leave the Opening balance fields blank and that you enter the any open (unpaid) customer invoices later.
Once you set up the import file in Excel, upload the Excel file, map the data to the data fields in QBO, and then import the data.
Here’s a Slideshare post which you can download and save:
That’s all for my post on how to add customers in QuickBooks Online. Remember, you can add them one at a time or you can import a list into QBO. Once customers are set up, you will be able to start creating sales invoices in no time. Next time, I’ll go over how to set up customer jobs. If you find these tutorials helpful please share them with others – I would really appreciate it. Till next time!

