To catch up on her QuickBooks Online knowledge, Jasmine Jones has recently read 5 Minute Bookkeeping™ using the Sales Center in QuickBooks Online. Although Jasmine now felt like she was a Sales Center expert, she also wanted to learn more. Specifically, Jasmine also wanted to learn how to manage her expenses and enter vendor transactions like vendor bills, from a single convenient location. Well, I hope that you and Jasmine are ready for more 5 Minute Bookkeeping™ tips and tricks? Because, in this blog post, I’m going to show you and Jasmine how to do 5 Minute Bookkeeping™ using the Expenses Center in QuickBooks Online.
5 Minute Bookkeeping™ is all about saving time and doing things right the first time so that you don’t have to go back and fix it. From the Expenses Center in QuickBooks Online, you can gets lots of things done in no time. I’ll take you through a tour of the Expenses Center and share my time-saving tricks with you.
[bctt tweet=”5 Minute Bookkeeping™ is all about saving time and doing things right the first time so that you don’t have to go back and fix it.” username=”5MinBookkeeping”]
How to access the Expenses Center in QuickBooks Online
To access the Expenses Center, click on Expenses from the Left Navigation bar, then select the Expenses tab.
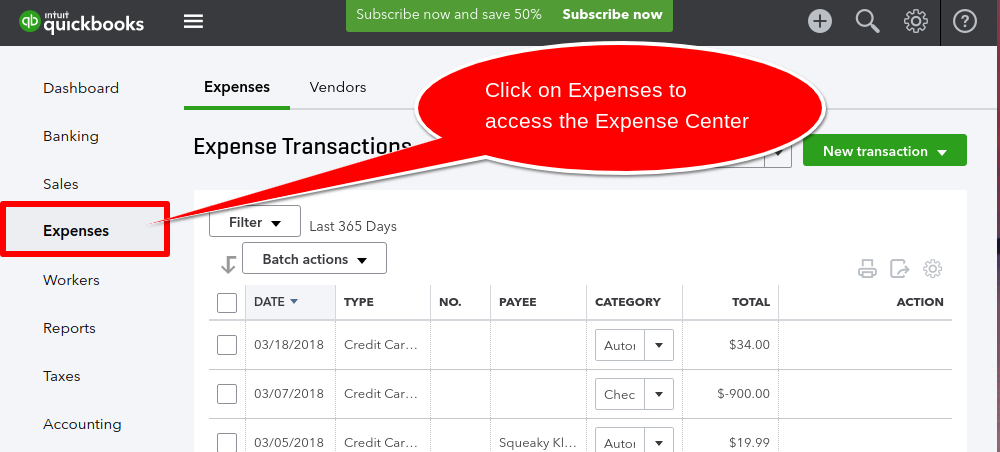
View the Expenses list in QuickBooks Online
Select the Expenses tab to view a list of all the expense transactions (bills, bill payments, checks, credit card expenses, and credit card credits). Expenses are sorted chronologically by default.

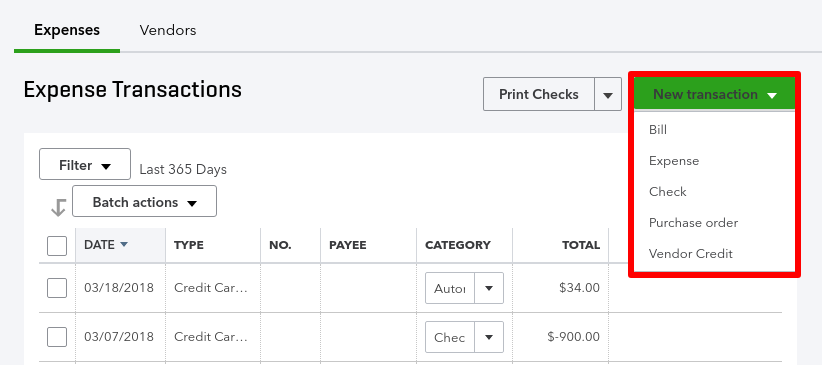
Create transactions directly from the Expenses Center in QuickBooks Online
Save time by creating transactions directly from the Expenses center. In the upper right-hand corner, select New transaction.
Click the down-arrow and select one of the choices to create a transaction such an expense, a bill, a check, or a purchase order. This way, you don’t have to enter a transaction from the Quick Create (+) menu.

View the Vendor List in QuickBooks Online
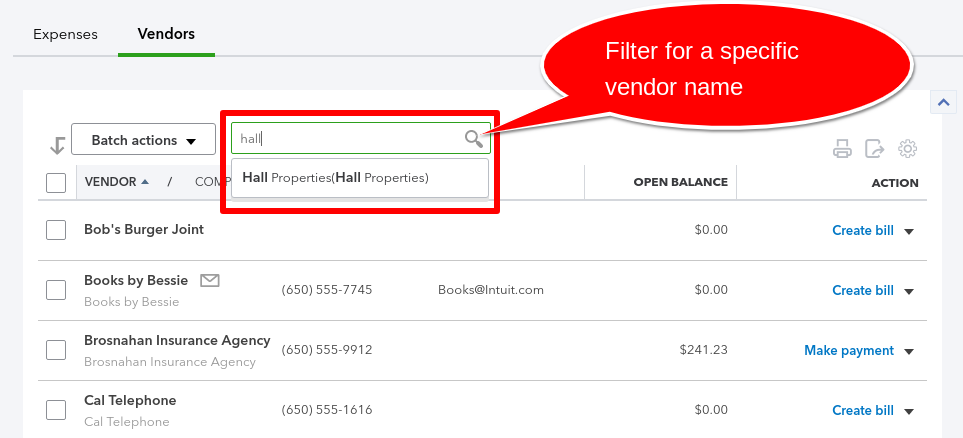
Next to the Expenses tab is the vendor list in QBO, which can be accessed by clicking on the Vendors tab. Vendors are sorted alphabetically by default.

You can quickly find a specific vendor by entering the vendor name into the search field.
The Vendor List Money Bar
At the top of the Vendors list you will also see a multi-colored money bar.
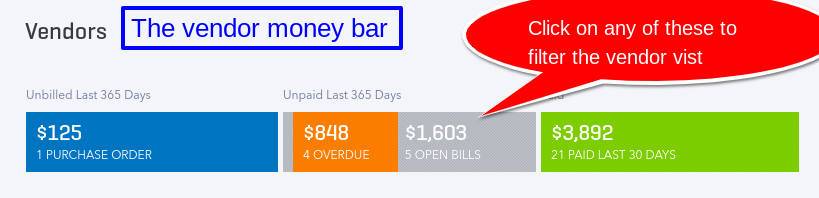
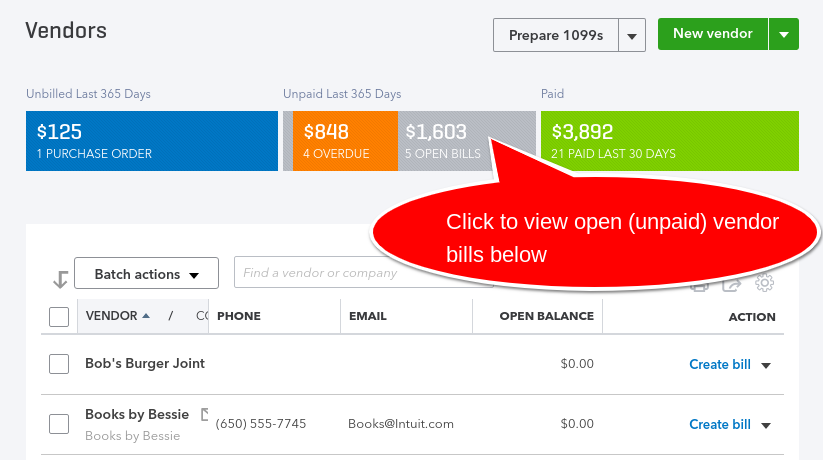
The money bar is a quick way to filter specific types of expense transactions. For example, click on the Open Bills button to view all unpaid vendor bills.
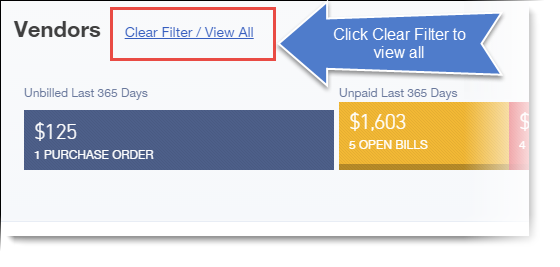
To clear the filter, simply click Clear Filter / View All
View a vendor file in QuickBooks Online
From the Expenses Center, click on the vendor’s name to open the vendor file in QBO. You can view vendor details, vendor notes, and transactions with that vendor
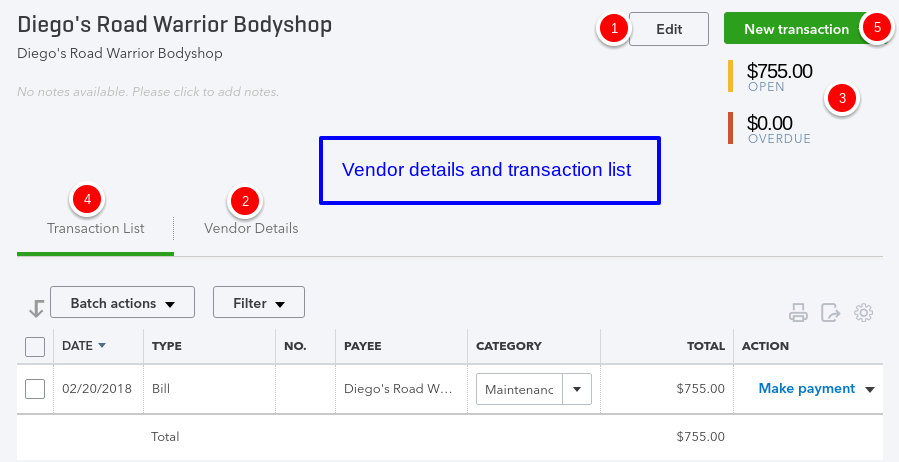
- Click Edit to edit vendor details.
- View the vendor’s contact information and notes.
- You can see the vendor’s open (unpaid balance) and overdue balance.
- You can view the list of transactions you have with that vendor, including bills, bill payments, checks, and purchase orders.
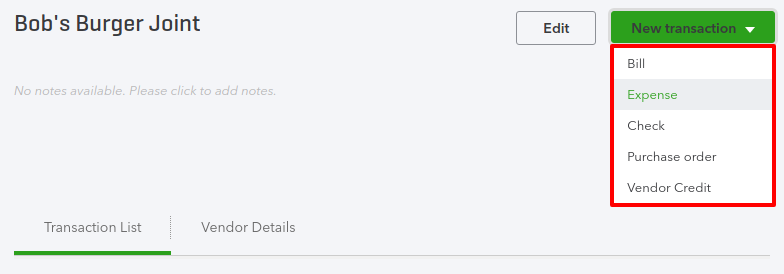
- Click on the blue “New transaction” box to add a new transaction, such as:
- Bill
- Expense
- Check
- Purchase Order
- Vendor Credit
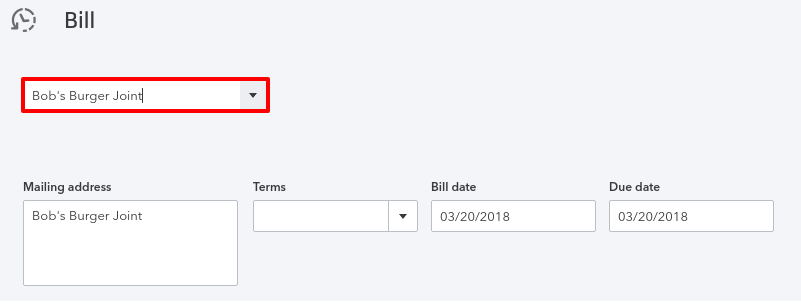
Create transactions from the Vendors tab in QuickBooks Online
Save time by creating transactions directly from the Vendors list.
Open a vendor file and select New Transaction.
![]()
You will then have a choice to create a transaction such an expense, a bill, a check, or a purchase order.
As an added bonus, the vendor’s name will already be added to the transaction – saving you extra data entry time.
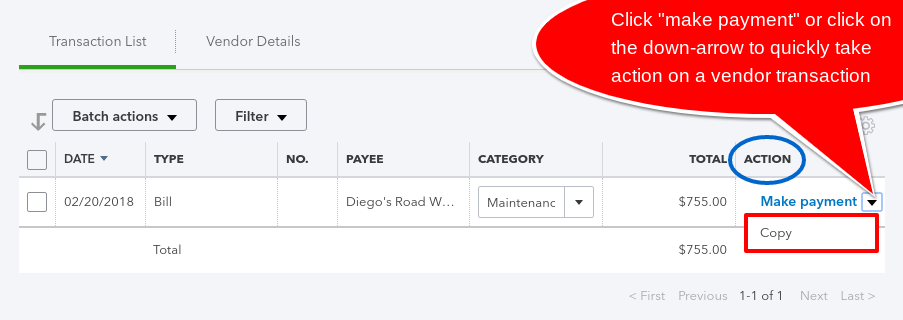
Vendor file tips and tricks
From the vendor file, you can take quick action on transactions with a simple click. From the action column click on make payment or click on the down arrow to enter a bill payment or copy a vendor bill.
- Click on the gear icon to the right to see more columns. I like to click on the “Status” box to see whether the bill is paid or unpaid.
- You can quickly correct the account category used. Just click on the black arrows to change the category. This way, you can make a quick correction if you picked the wrong account.
![]()
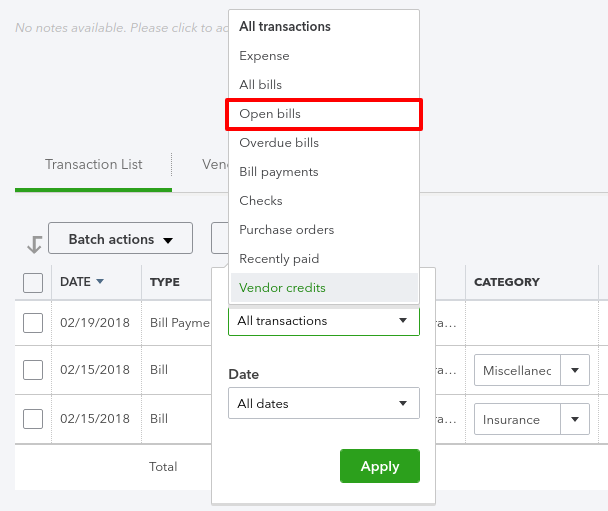
Click on Filter to view only specific transactions.
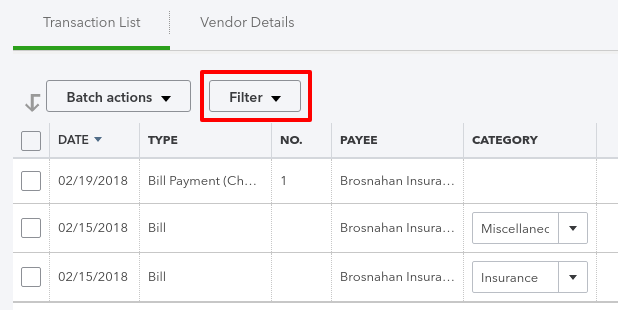
For example, you can filter for only open bills or overdue bills.
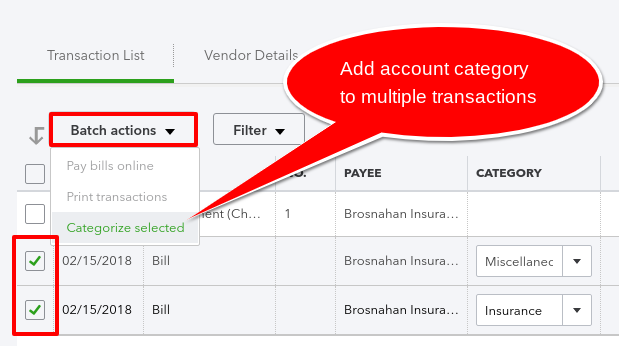
How to change categories on multiple vendor bills
Have you ever had a problem with transactions showing up in uncategorized expense? Here’s a quick way to fix it using batch actions.
Click on the transactions you want to change. Click batch actions and select categorize selected.
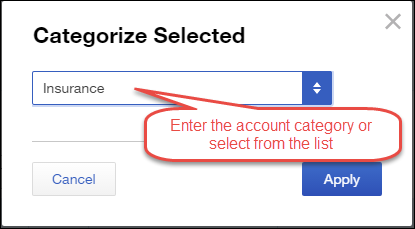
A new window will open. Enter the account category or select from the list. Click Apply when done.
Final thoughts
These are just some of the ways that you and Jasmine can save time and keystrokes in the Expenses Center of QBO. Go ahead and try out some of the new skills you just learned.
By the way, did you notice that the Expenses center in QBO looks a lot like the Sales center in QBO? If you did, kudos to you! That’s the beauty of QBO – you can learn it quickly!
That’s it for our 5 Minute Bookkeeping using the Expenses center in QuickBooks Online. Do you want to get more 5 Minute Bookkeeping tips and QBO tutorials? Be sure to subscribe to our content.