Ever since discovering 5 Minute Bookkeeping™, Jasmine has been taking advantage of all of our step-by-step QuickBooks Online tutorials. But now, it’s time for Jasmine to take her knowledge to the next level and to start doing some 5 Minute Bookkeeping™. And it all couldn’t come at a better time, because Jasmine Jones was in a bind. She was still relatively new to QuickBooks Online, and was having trouble tracking her sales. Although she knew some basic actions like how to create a customer invoices, Jasmine was frustrated because she couldn’t monitor her customers AND create customer transactions, like invoices, all from one convenient location. We’ll Jasmine is in for a treat today, because in this blog post, I’m going to show you and her how to do 5 Minute Bookkeeping™ using the Sales Center in QuickBooks Online.
5 Minute Bookkeeping™ is all about saving time and doing things right the first time so that you and Jasmine don’t have to go back and fix it. The Sales Center in QuickBooks Online is full of time-saving shortcuts. I’ll take you and Jasmine on a tour through the Sales Center and share my tips and tricks.
HOW TO ACCESS THE SALES CENTER IN QUICKBOOKS ONLINE
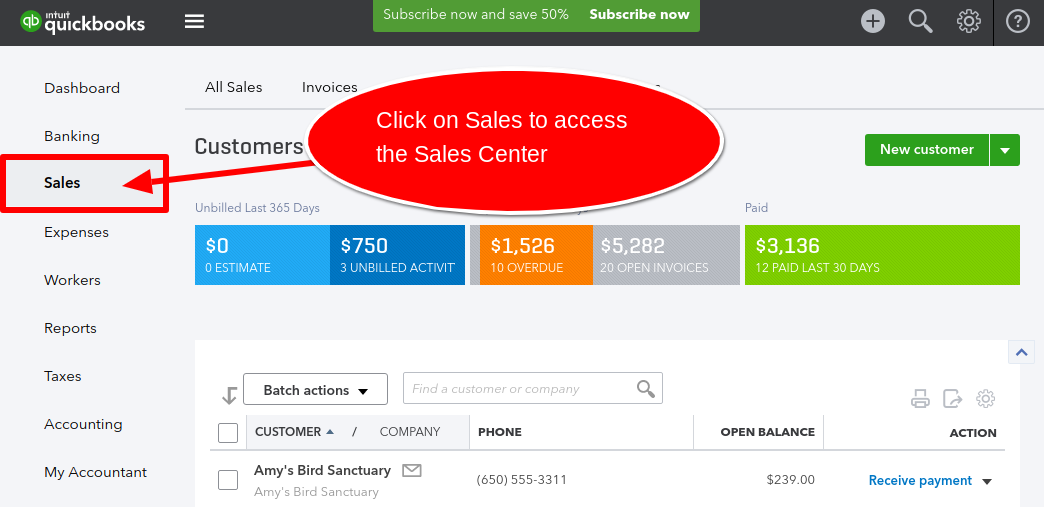
To access the Sales Center, click on Sales from the Left Navigation bar.
TOUR OF THE SALES CENTER IN QUICKBOOKS ONLINE
The Sales Center is full of cool features. First, the money bar.

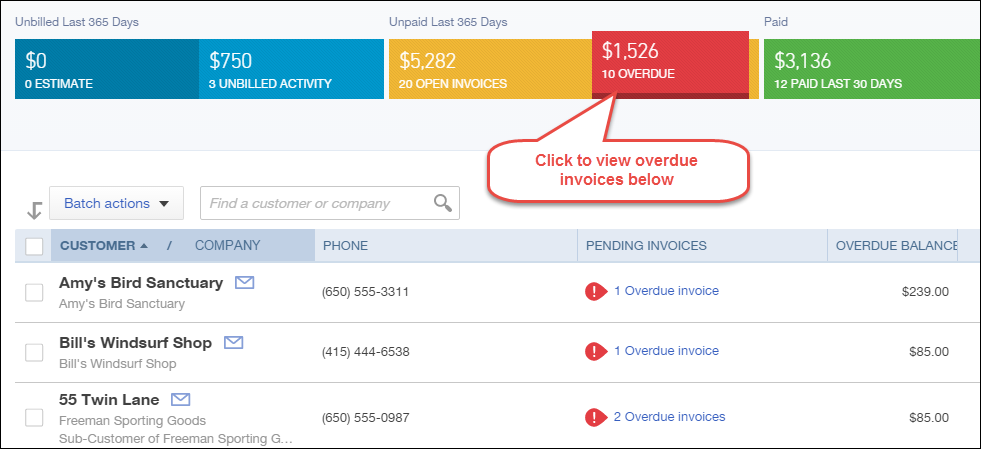
You and Jasmine might be distracted by the colorful money bar to notice that it’s a very useful tool. The money bar is a quick way to filter specific types of customer transactions. For example, click on the Overdue button to view all past due invoices.
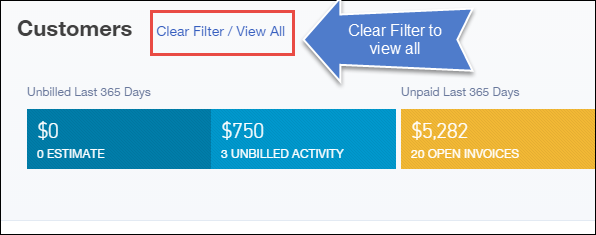
To go back, simply clear the filter by selecting Clear Filter / View All.
VIEW AND CREATE INVOICES FROM THE SALES CENTER IN QUICKBOOKS ONLINE
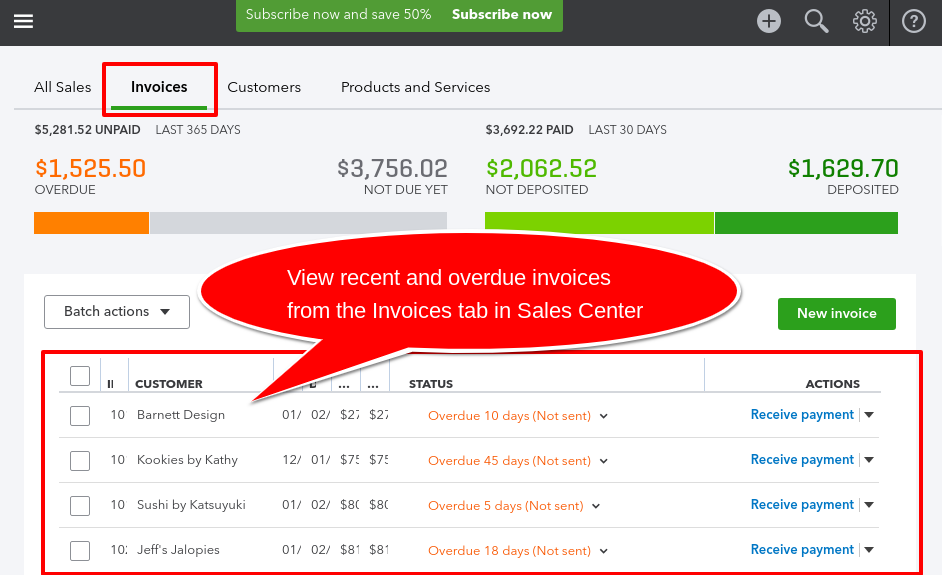
So, what if Jasmine wants to monitor her customer invoices – no problem. From the Sales Center, select the Invoices tab. Here, you and Jasmine can view recent invoices, including overdue invoices.
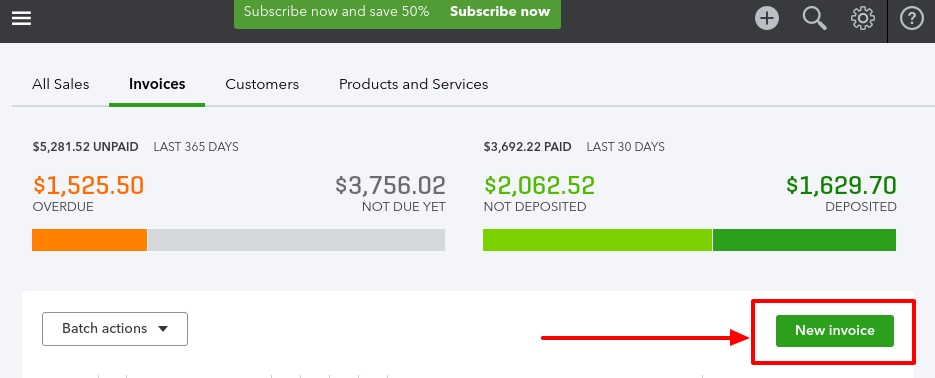
You and Jasmine can also create new customer invoices by selecting New Invoice. Creating new customer invoices from the Sales Center is very convenient since you and Jasmine can monitor sales and customers from the same location.
VIEW THE CUSTOMER LIST IN QUICKBOOKS ONLINE
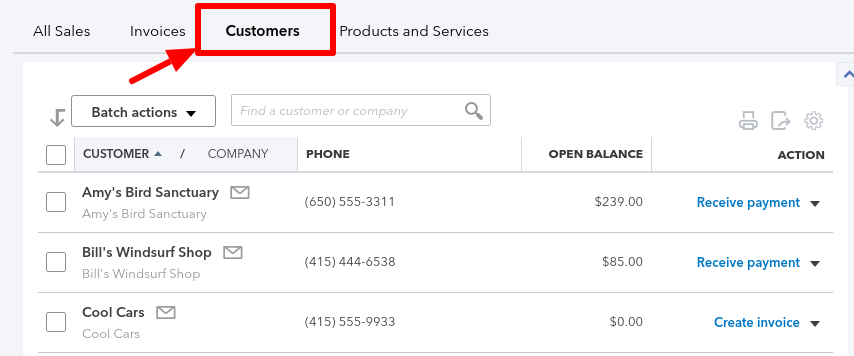
To view the Customer List, simply select the Customers Tab. Customers are sorted alphabetically by default.
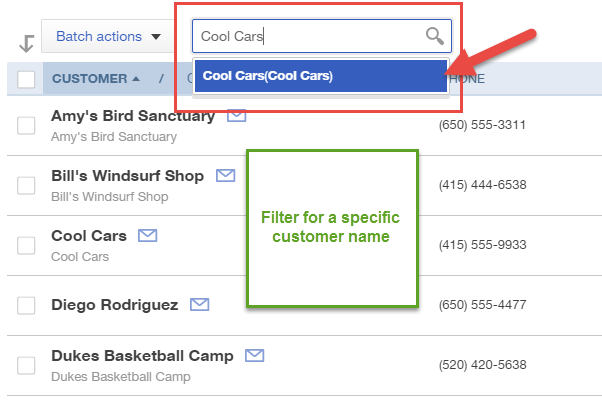
You and Jasmine can quickly find a specific customer or company name by entering the customer name into the search field.
CREATE TRANSACTIONS DIRECTLY FROM THE SALES CENTER IN QUICKBOOKS ONLINE
Want to save time by creating transactions directly from the Sales Center? Next to the customer name in the Action column, you will see a drop-down arrow.
Click the drop-down arrow 
Select one of the choices to create a transaction such a statement, invoice, sales receipt, or estimate. You can even send past due reminders. This way, you don’t have to enter a transaction from the Quick Create (+) menu and the customer’s name will already be added to the transaction – saving you data entry time.

VIEW A CUSTOMER FILE IN QUICKBOOKS ONLINE
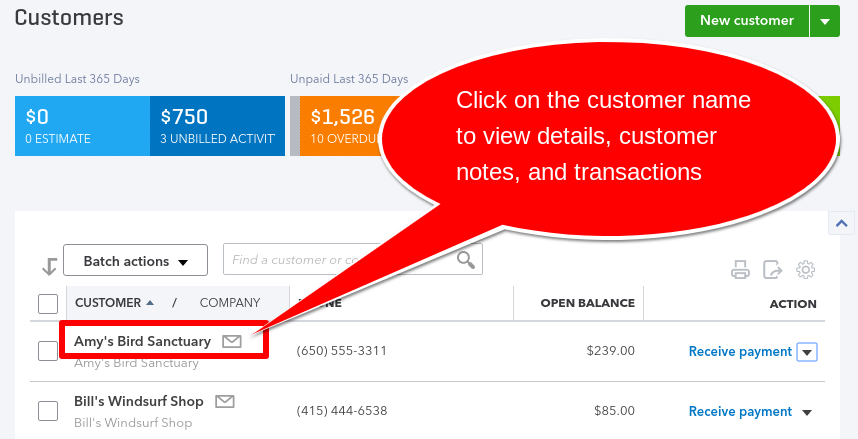
From the Sales Center, on the Customers tab, click on the customer’s name to open the customer file in QBO. You can view customer details, customer notes, and transactions with that customer.
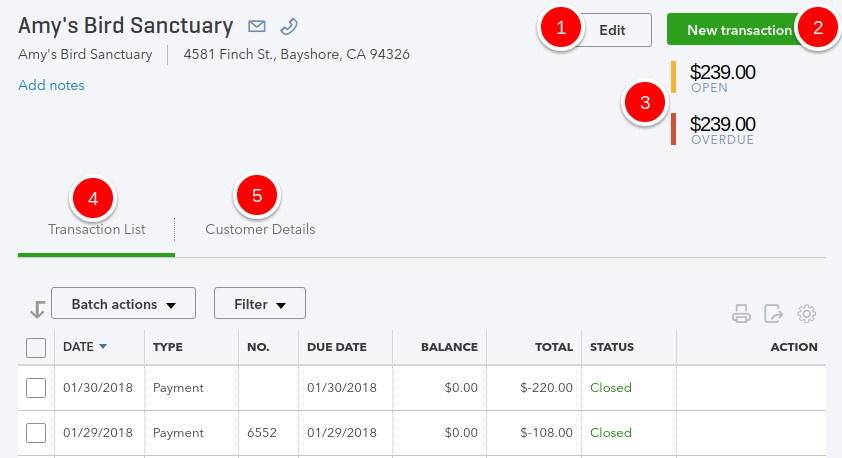
1. Click Edit to edit customer details.
2. Click on the blue “New transaction” box to add a new transaction, such as:
- Invoice
- Payment
- Estimate
- Sales Receipt
- Credit memo
- Delayed charge
- Time activity
- Statement
3. You can see the customer’s open (uncollected balance) and overdue balance
4. You can view the list of transactions you have with that customer, including invoices and customer payments
5. You can view details of the customer information – such as contact information, etc.
CUSTOMER FILE TIPS AND TRICKS
From the customer file, you can take quick action on transactions. From the action column, click on the down arrow.

You will then have a choice of actions you can take, such as: to print an invoice, send (email) an invoice, print a packing slip, or copy an invoice.

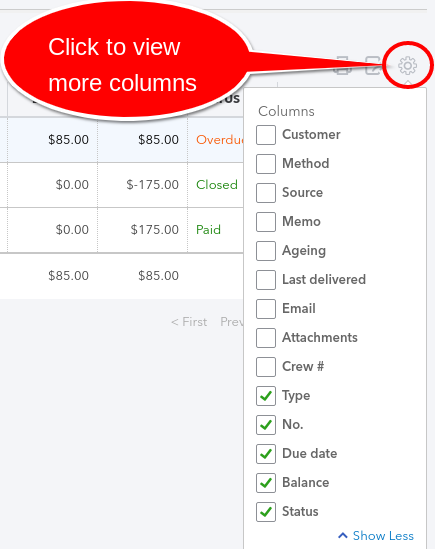
Click on the gear icon to the right to see more columns. I find it really useful to click “last delivered”. This way I know when I emailed the customer their invoice.
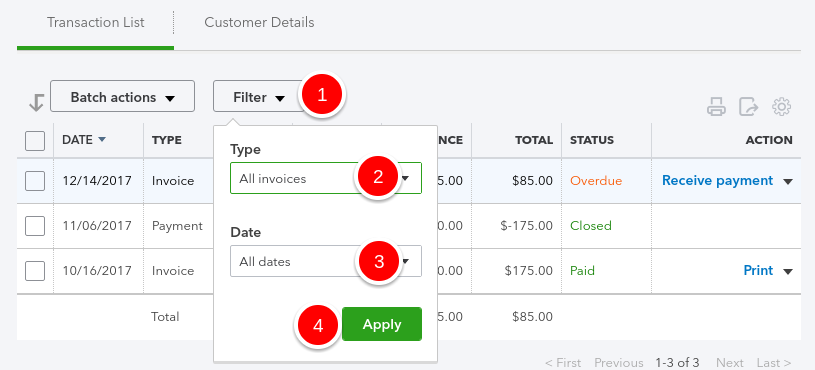
The Filter action is a useful tool to search for specific transactions.
- Click on Filter to view only specific transactions.
- Select the Type. For example, I like to filter transactions by invoice, I will select All invoices so that I can see only the invoices I have sent customers.
- You can also filter transactions by date.
- Click Apply to apply the filter.
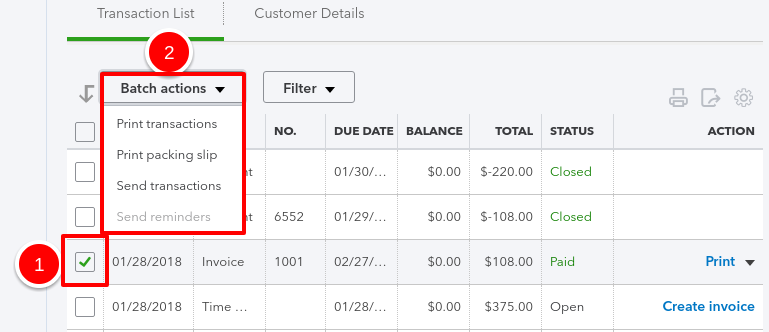
Do you and Jasmine want to send packing slips, print multiple customer transactions, or email customer invoices in a batch? Use the Batch actions feature.
- Check the box on the transactions (like invoices).
- Then, click Batch actions and make the appropriate choice.
VIEW AND ADD PRODUCTS AND SERVICES FROM THE SALES CENTER IN QUICKBOOKS ONLINE
From the Sales Center, select the Products and Services Tab. From here, you and Jasmine can view and edit the products and service items that your business sells.
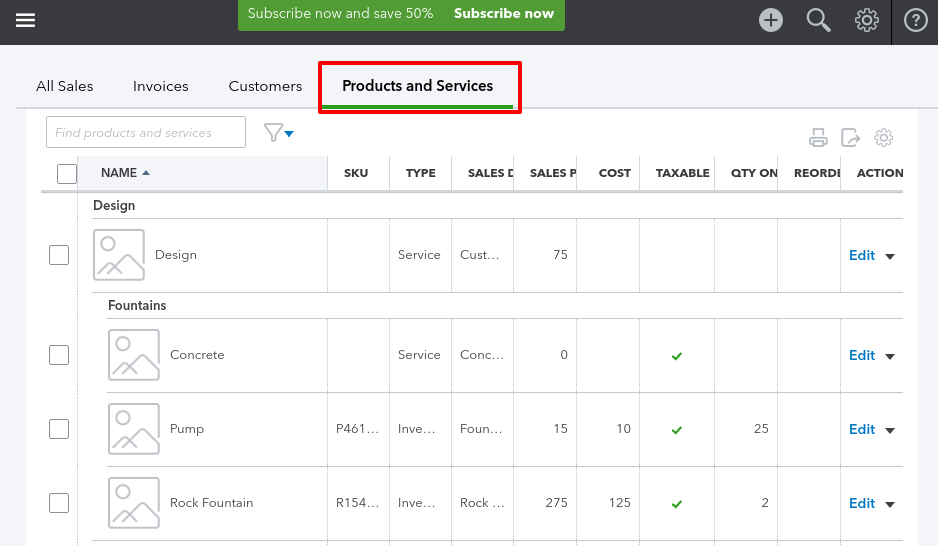
To edit a Product and Service item, simply select Edit, in the Action column.

New Product and Services can also be added from this section by selecting New.

You and Jasmine can learn more about setting up Products and Services by reading: How to set up Products and Services list in QBO.
FINAL THOUGHTS
I’ve just shared with you and Jasmine lots of different ways in which you both can save time and keystrokes from the Sales Center in QBO. Be sure to try these out and share your mad skills with others. I encourage you to share this post and tell others about 5 Minute Bookkeeping using the Sales Center in QuickBooks Online. Subscribe to our blog so you can get more step-by-step QBO tutorials and 5 Minute Bookkeeping tips.




I want to see different contracts that are for the same product or service to be reported separate on the income statement. For example, if I have a data entry clerk as the product/service, and I provide this product/service under different contracts, I don’t want to see the total income from the data entry clerks. I want to see the total income by contract/customer. Can this be done, if it’s already reporting it together under service? I can drill down and get the detail, but I’ve been exporting the profit and loss statement into excel to manipulate the data to get the customer/contract detail
QBO was already set up when I took it over and there is history in the different products that I don’t want to loose. I’d just like to change the reporting to be by customer/contract rather than product/service.
Great question. That is essentially like job costing or project tracking. You can set up each contract as a subcustomer in the customer center. Use the subcustomer name to prepare invoices. Then run a profit and loss report and customize the report so that it shows you the customer name in the columns.