Jill and Bob were neither bookkeepers nor accountants. All they knew how to do was run their business. Nevertheless, Jill and Bob understood that they needed to do some bookkeeping, especially for filing a tax return. Because of this, Jill and Bob purchased QuickBooks Online. As they started setting up QBO, many things seemed simple.
Then they had to contend with the “Chart of Accounts” …..dun dun dun…
Jill and Bob had a terrible feeling of dread. They didn’t know what a Chart of Accounts was, and they had no idea how it worked. Because they didn’t have any training in accounting, Jill and Bob were afraid that one small error would spiral into such a huge mess that their books would get totally messed up. No need to worry, because you don’t have to learn accounting to understand the Chart of Accounts. In this blog post, I’ll show you how to set up the Chart of Accounts in QuickBooks Online.
What is the Chart of Accounts?
What is the chart of accounts and why do I need to use it? The Chart of Accounts is simply a list of accounts you will use to classify transactions in QBO. Setting up the Chart of Accounts correctly is an essential part of setting up your company in QBO.
How do you set up a chart of accounts in QuickBooks Online?
Thankfully, with QuickBooks Online and other small business accounting software programs, you don’t need to know how to set up a chart of accounts. QuickBooks Online makes it easy to set up a chart of accounts in just a few simple steps. When you first set up QuickBooks Online, your answers in the Startup Interview will help QuickBooks Online set up the chart of accounts for you, based on your industry and company.
Here is my video – Part 1 of How to Set Up the Chart of Accounts in QuickBooks Online.
How to get to the Chart of Accounts in QuickBooks Online
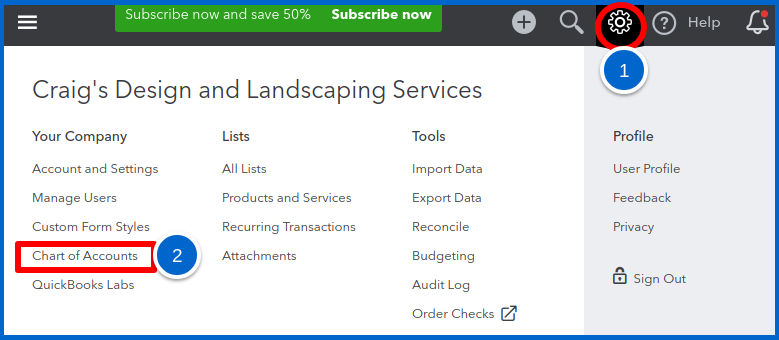
To get to the Chart of Accounts:
- Select the Gear Icon.
- Select Chart of Accounts.
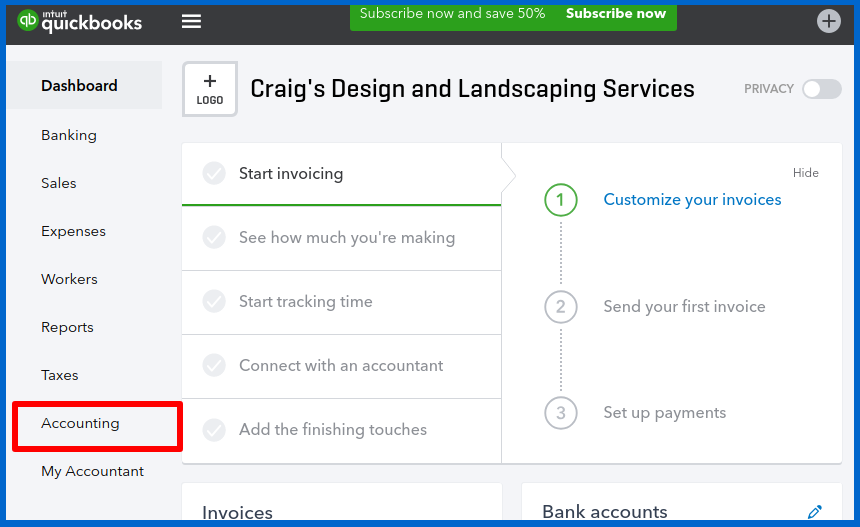
Here is another way you can get to the Chart of Accounts:
From the left navigation bar, select Accounting.
How to view Chart of Accounts in QuickBooks Online
When you set up your company in QBO for the first time, QBO will set up a default list of accounts for you. It’s not a complete list, but it has many of the accounts that you will use.
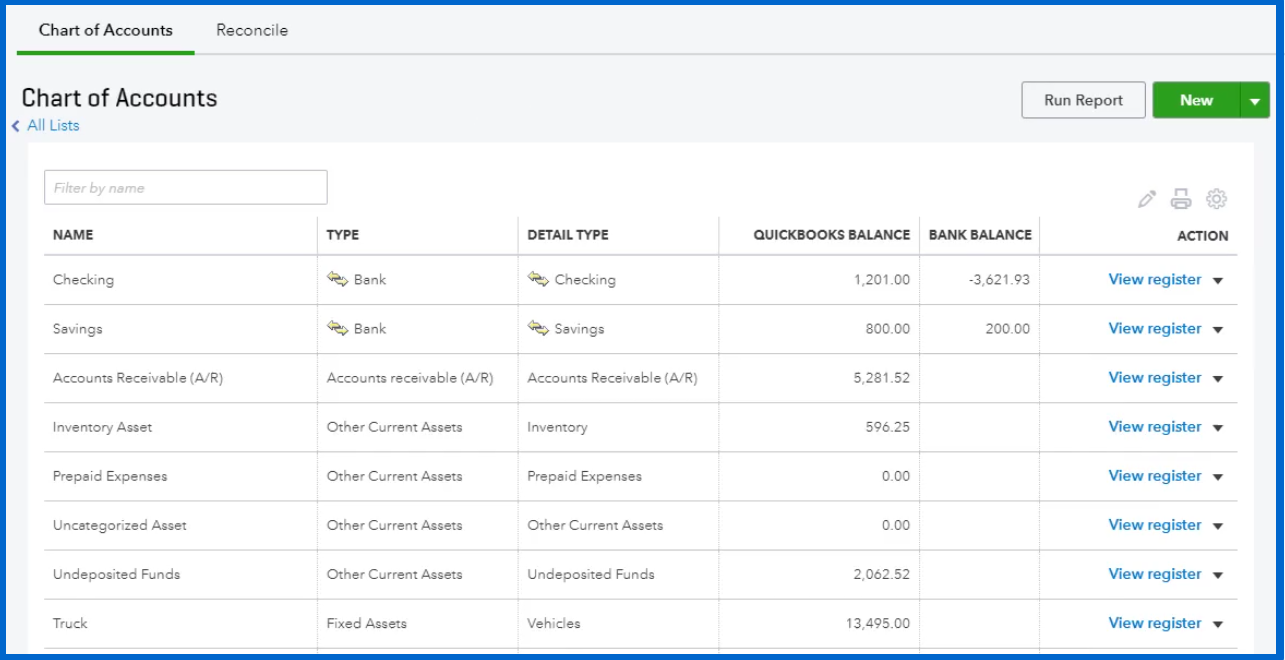
Each account has an account name. You can see account names listed here in the NAME column.
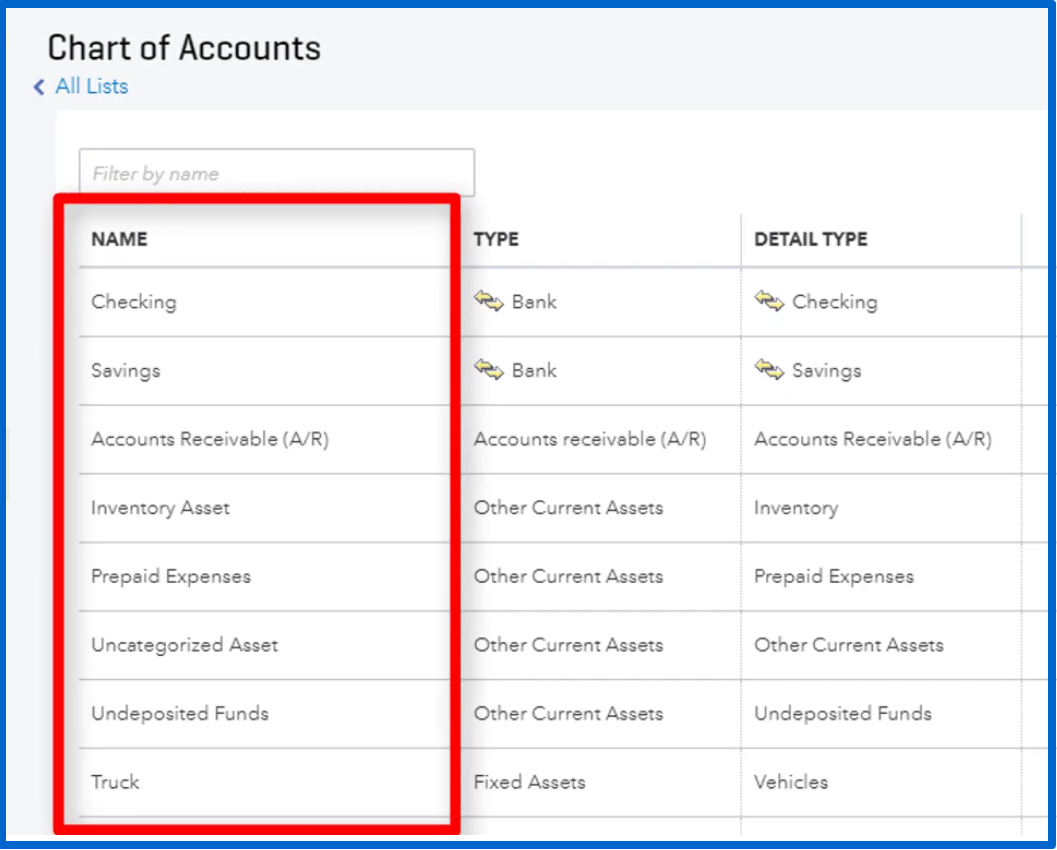
Some accounts that you may be familiar with, include the:
- Checking account
- Credit Card accounts
- Income accounts (Sales)
Each account is also assigned a category called TYPE.
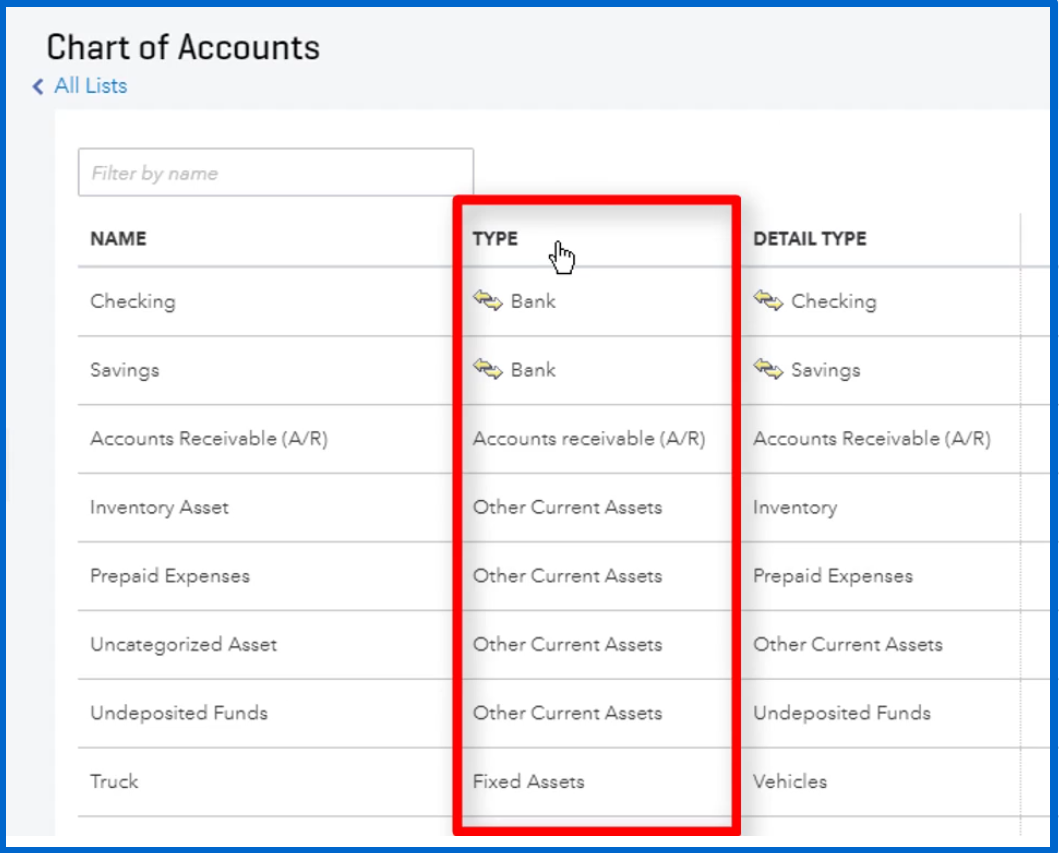
The list of account TYPES is pre-populated in QBO. You can’t change it.
Some account types you will be working with include:
- Bank
- Credit card
- Income
- Expenses
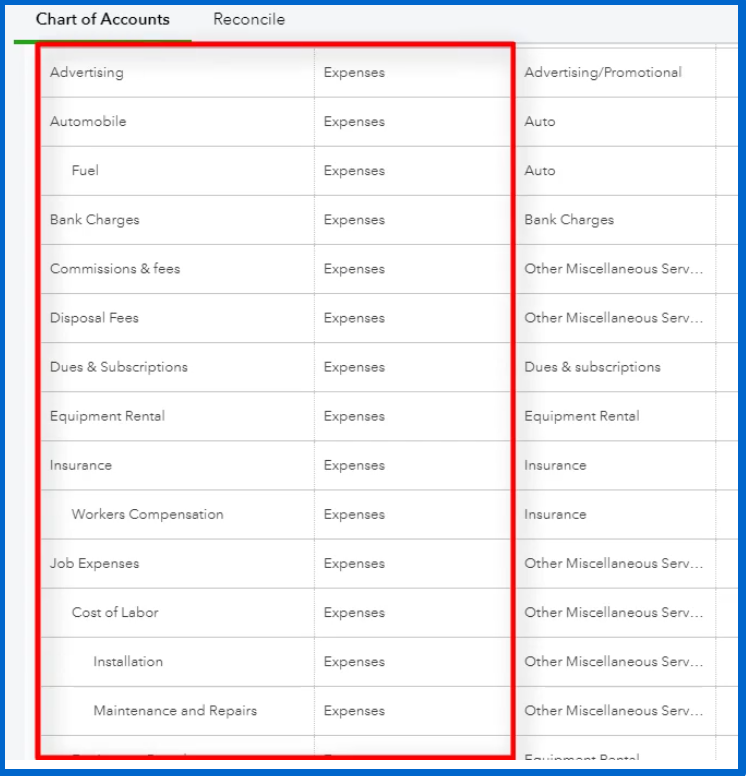
The account list is sorted first by type and then alphabetically within account types. For example:
Here, you can see that expenses are listed alphabetically within the expense category type. So, expenses like Advertising or Automobile will be listed first.
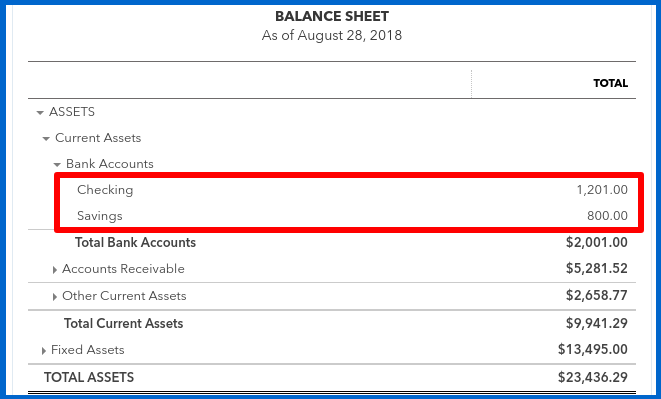
Account types are important because they determine where the account balance will show up on financial reports, such as the Balance Sheet and the Profit & Loss report.
Here is a Balance Sheet.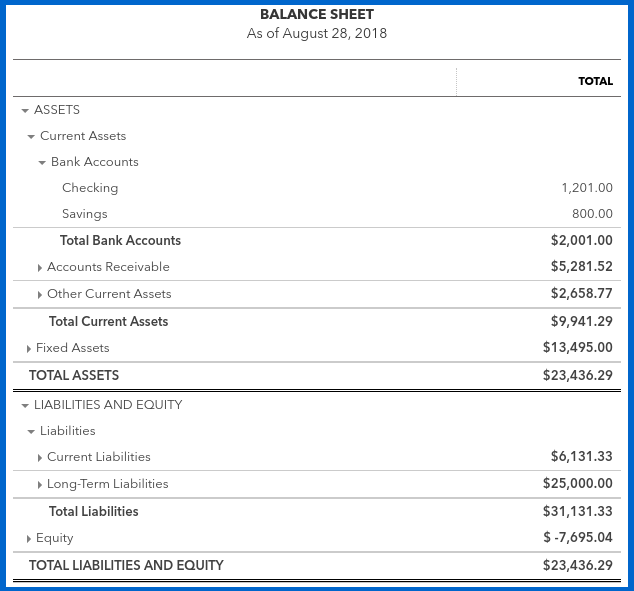
You can see the category type, such as bank accounts, and the specific accounts set up within that category type, like Checking and Savings.
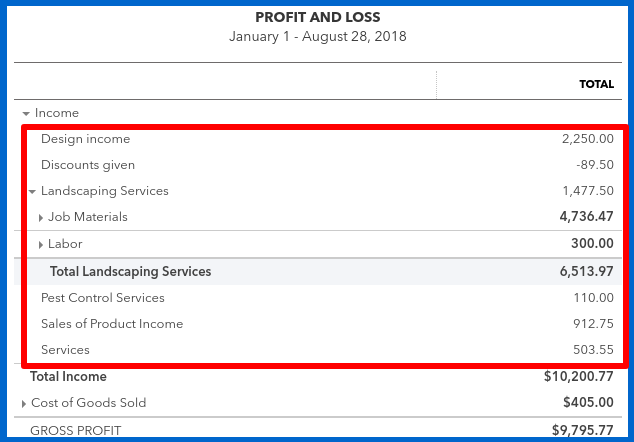
Here is a Profit & Loss report.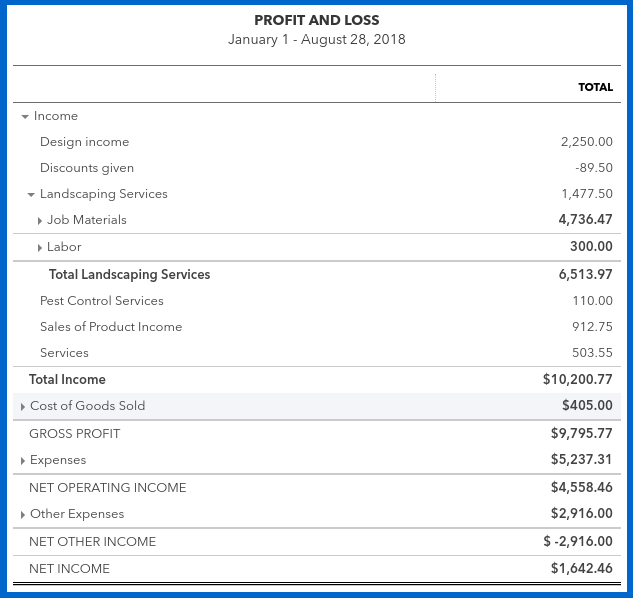
Here, you can see Income category, and the accounts listed under that category.
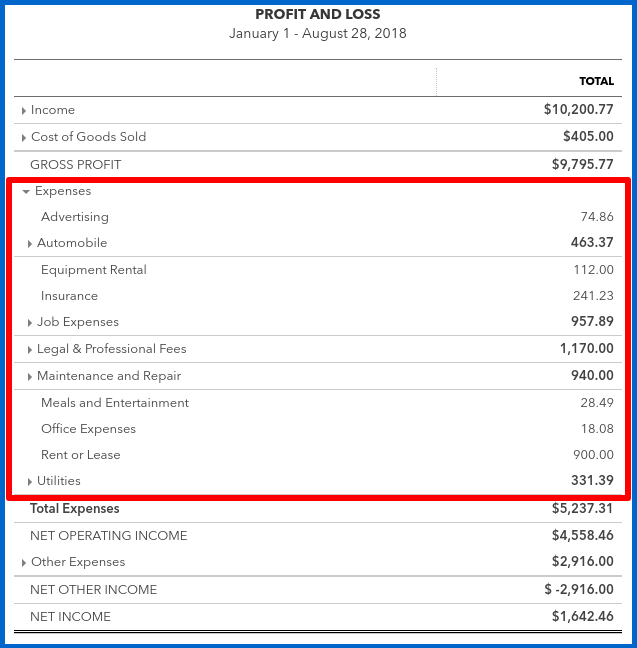
In the Profit & Loss report, you will also see the Expense category, and all of the accounts that appear under the Expense category type.
How to edit accounts in the Chart of Accounts
Accounts from the Chart of Accounts can be edited. That means, you can change an account name, create sub-accounts, delete accounts, and create new accounts. Let’s start with something simple, such as changing an account name.
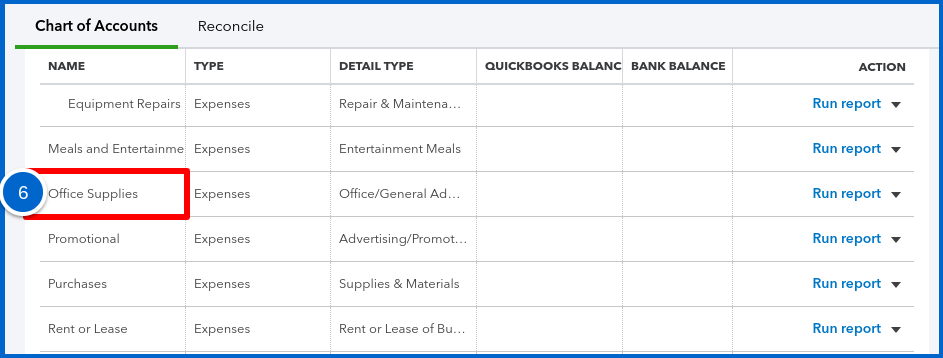
In our example, let’s change the name of the Office Expenses account to Office Supplies.
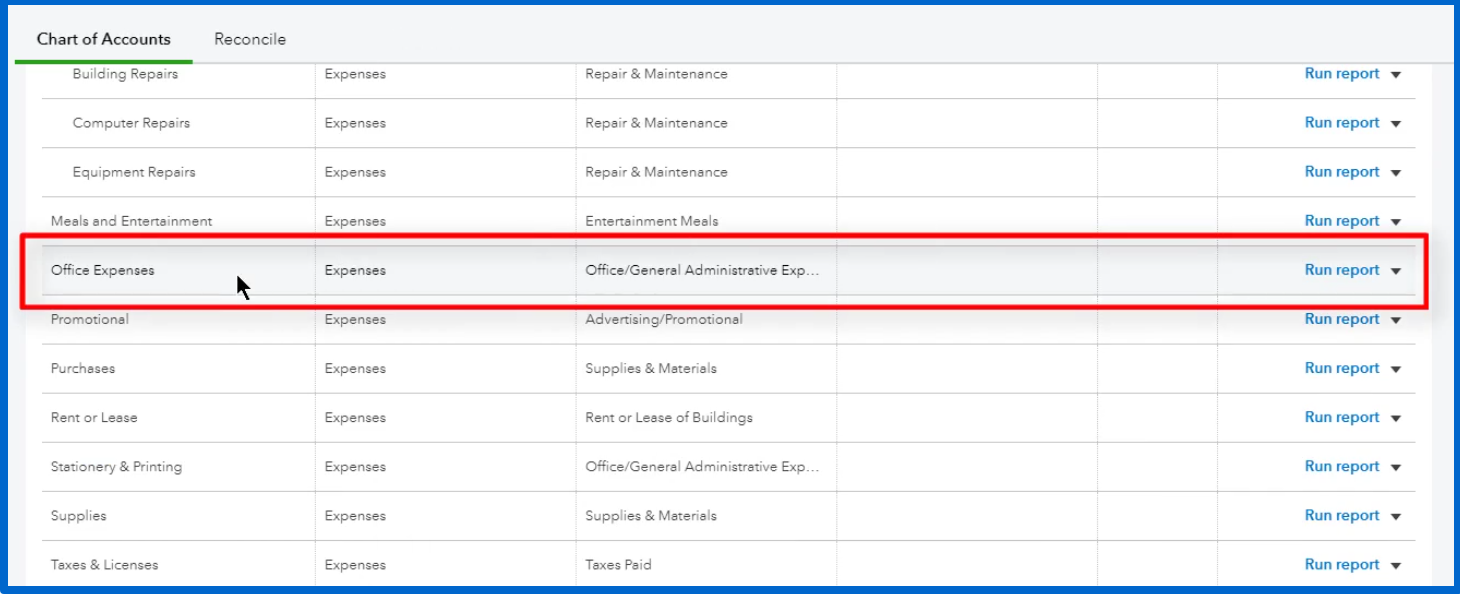
In the Chart of Accounts:
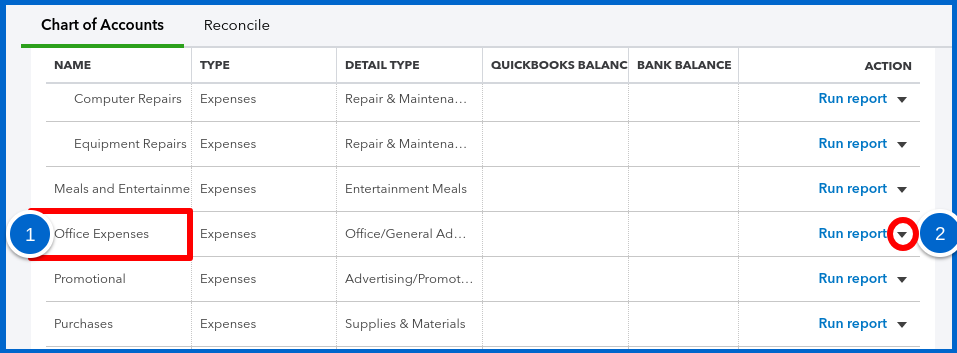
1. Find the account.
2. To the right of the account, select the drop-down arrow next to Run report.
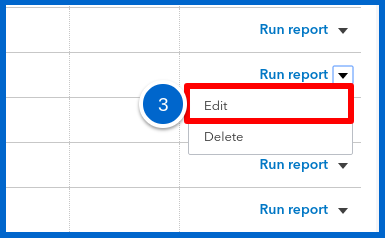
 3. Select Edit.
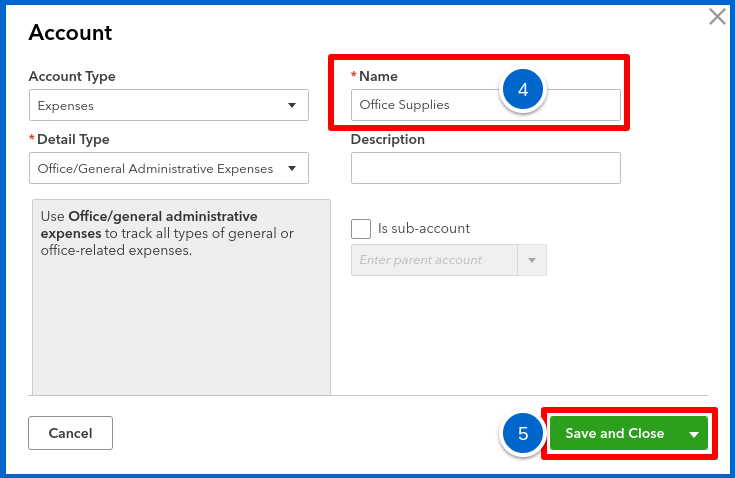
 4. Under the *Name field, enter Office Supplies.
5. Select Save and Close.
- If you go back to the Chart of Accounts, you can see that the account name has now been changed to Office Supplies.
How to add a sub-account in the Chart of Accounts
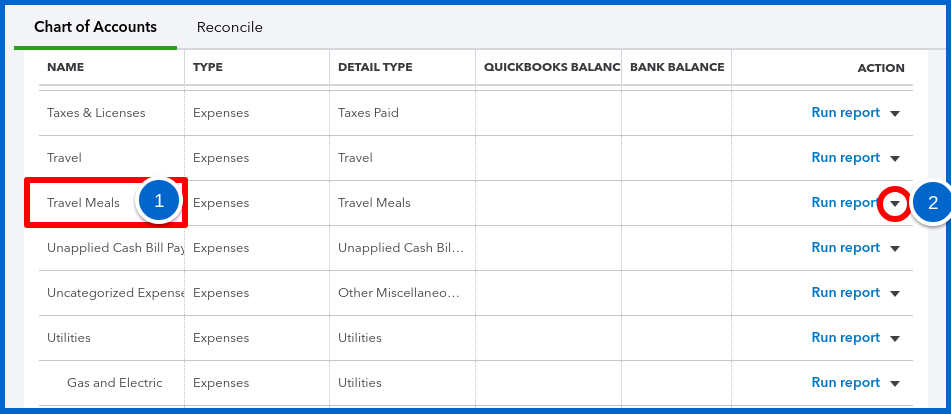
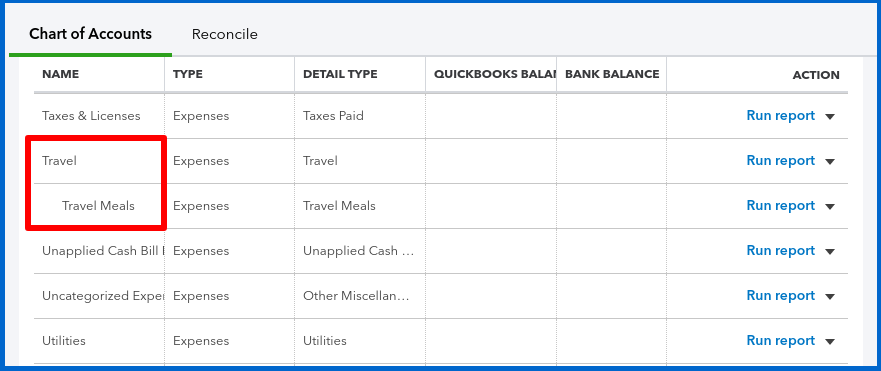
In this example, we have two accounts, “Travel” and “Travel Meals.” Let’s make “Travel Meals” a sub-account of “Travel.”
- Select Travel Meals. (Click once)
- To the right of the account, select the drop-down arrow next to Run report
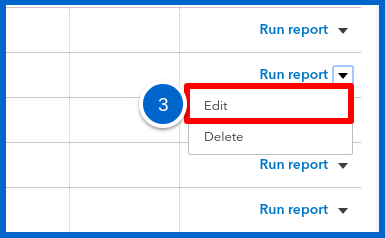
- Click Edit on the right.
You can now make changes to the Travel Meals account
- Check “is sub-account.”
- A dropdown box will appear. Find the parent account by typing Travel.
- Then click Save and Close.
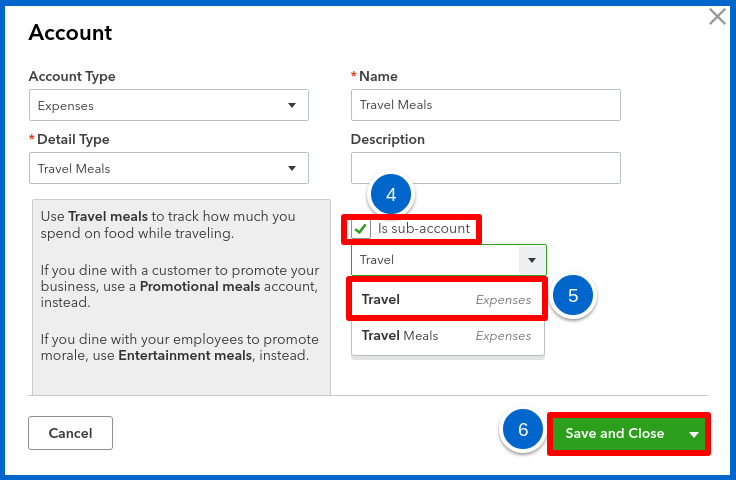
Travel meals will now appear as a subaccount of Travel in the Chart of Accounts.
How to delete an account in the Chart of Accounts
Let’s say that you want to delete an account.
From the Chart of Accounts:
- Click the account name that you want to delete. For our example, we’ll select Purchases.
- On the right side of the account name, select the drop-down menu, next to Run Report
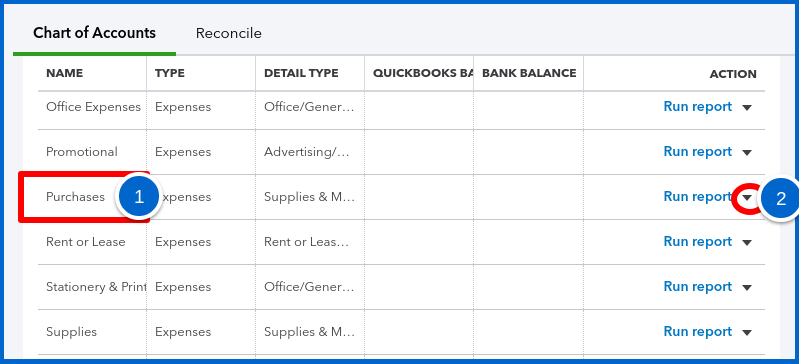
- From the drop-down menu, select Delete.
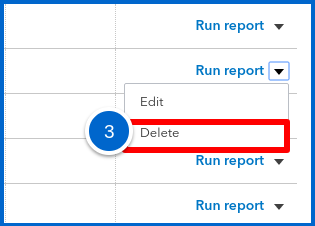
The account has not actually been deleted, but marked inactive, meaning that you can restore it at a later time.
Note: If you want to see an account that you deleted:
- Select the Gear Icon.
- Check the “Include Inactive” box.
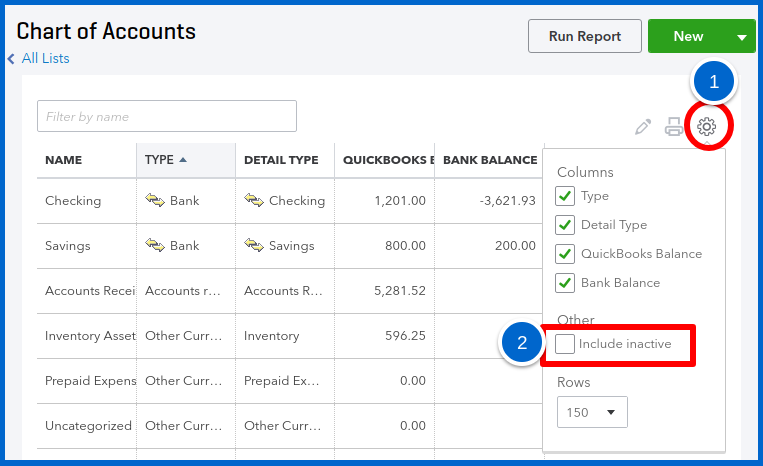
You will see a list of all the accounts, including those which have been deleted.
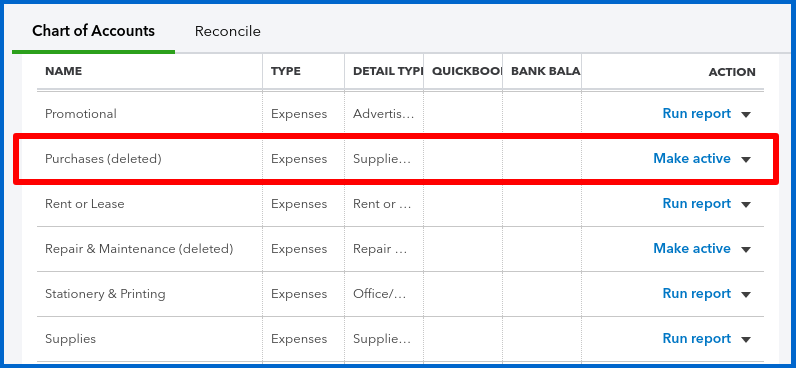
To undelete an account:
- Locate the deleted account.
- Select Make active.
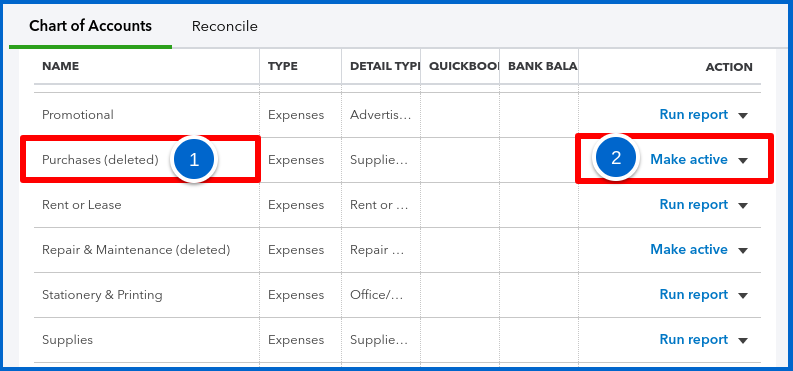
Closing
I’m sure that now Jill and Bob feel a lot more relieved to know that they don’t have to know complex accounting to understand the Chart of Accounts. And, I hope that you’re relieved as well.
But, we’re not finished, because there’s still more to discuss.
In the next blog post about the Chart of Accounts, I’ll cover:
- How to add new accounts.
- How to change the “Category Type” of an account.
- Best practices for creating and naming accounts.
In the meantime, I hope that you have found this QuickBooks Online Chart of Accounts tutorial helpful. Be sure to check out all of our step-by-step tutorials. Be patient and keep learning – soon you too will be doing 5 Minute Bookkeeping. Till next time!
Join our FaceBook Community
Want to connect with others, ask questions, and exchange ideas? Then, join our Facebook Community – 5 Minute Bookkeeping with QuickBooks Online.


Well excellent article its very help us and we impressed , its very interesting post thanks for this post sharing to all, get best management suggestions and best software also provide to all in this blog, sure this blog will useful
Thanks for your kind comments. I’m so glad that you find our content useful.